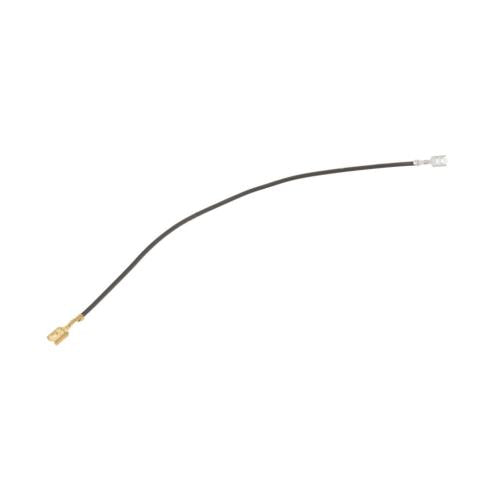
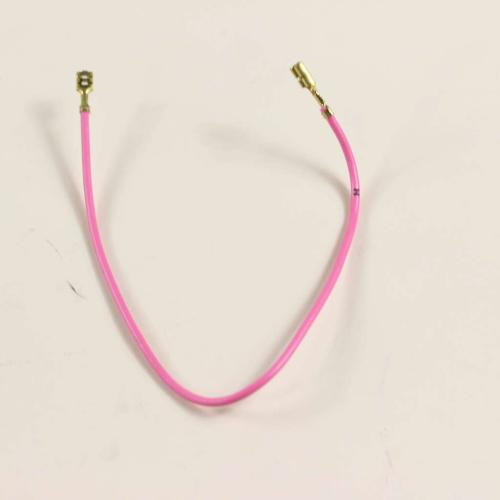
A GE dryer wire harness carries power, commands, and sensor signals between controls, switches, thermostats, the motor, heater or burner components, and the user interface. Harness trouble can be constant or intermittent. A loose terminal may open when the cabinet vibrates, a conductor can break beneath intact insulation, and a high-current connector can overheat even when the attached component still tests correctly. Diagnose the circuit and connection before replacing a complete harness.
Disconnect power before moving any connector. Photograph the routing, clips, bends, shields, and connector positions from several angles. Look for darkened housings, melted plastic, green corrosion, backed-out pins, insulation worn through at a sheet-metal edge, and branches stretched across hot or moving parts. Do not tug on wires to release a plug; use its locking tab and connector body. If a terminal has overheated, inspect the mating component blade because both sides may need repair.
The GE dryer main wire harness WE08X29053 is a complete harness for specified configurations. Main harnesses can differ by fuel type, cabinet width, controls, sensors, and branch routing even when several plugs look alike.
Smaller branches are equally specific. The GE dryer black jumper harness WE15X25203 serves a defined connection and must match terminal material, length, protection, and heat exposure.
The GE dryer high-limit harness assembly WE15X26140 is a separate heat-path branch. Match its connector keying, terminal rating, and routing exactly.
Quick inspection sequence
- Record the exact failure and when it changes: startup, heating, vibration, cabinet movement, warm operation, door movement, or a specific cycle.
- Disconnect power and inspect the terminal block first for supply-related complaints. Burned line connections can imitate an internal harness or control failure.
- Photograph every plug and route, then check locking tabs, pin position, terminal tension, heat discoloration, corrosion, chafing, and missing protective sleeves.
- Use the wiring diagram to isolate the affected circuit. Test continuity while gently flexing only the de-energized suspect branch to reveal an intermittent conductor.
- Inspect both sides of any overheated connection, including the thermostat, heater, motor, switch, valve, or board terminal. Replace damaged mating surfaces together as required.
- Check clips and stand-offs that keep wiring away from the drum, belt, blower, heater, burner, sharp edges, and cabinet panels. Routing is part of the repair.
Match the correct GE dryer wire harnesse part
- Match the full harness part number, fuel and control configuration, connector keys, pin count, terminal type, wire gauge, branch lengths, labels, and protective sleeving.
- Compare every branch and clip location before removing the old harness. One extra or missing connector indicates a different configuration, not an optional lead.
- Do not change wire gauge, terminal material, fuse links, thermal protection, or high-temperature insulation. These details are part of the circuit rating.
- Use only an approved repair lead or terminal procedure when specified. Household wire nuts, twisted splices, generic crimp terminals, and unprotected solder joints are not suitable substitutions inside a dryer.
Common problems and repair checks
Why does the GE dryer stop or reset when the cabinet vibrates?
Vibration can move a loose plug, backed-out terminal, cracked conductor, weak door-switch connection, or unstable supply terminal. With power disconnected, inspect connectors along the affected circuit and check whether each terminal locks into its housing. The GE dryer wire harness WE15X25209 should be considered only if its branch and connectors match the damaged harness. Do not keep running the dryer while wiggling live wiring. A poor high-current connection can arc and overheat before it opens consistently.
Why is a GE dryer connector burned or melted?
Heat at a connector can result from weak terminal tension, corrosion, an incorrect terminal, loose installation, excessive current from the load, or heat from a nearby component. Disconnect power and inspect the mating blade, wire insulation, housing, and surrounding part. Replacing only the plastic shell or attached component may leave a resistive terminal in service. Determine whether the approved repair requires a harness, terminal lead, thermostat, heater, motor, or board connector. Correct the underlying current or airflow problem before the dryer is returned to operation.
Why does the GE dryer have no heat even though the thermostat tests correctly?
An open conductor, burned terminal, backed-out pin, failed control output, missing supply leg, or open heater can interrupt the same circuit. Trace the wiring diagram from supply to load and test each de-energized section. The GE dryer red jumper harness WE15X25206 is a specific jumper configuration, not a universal bridge for a no-heat circuit. Confirm wire gauge, terminal type, length, insulation rating, and assigned endpoints. Never bypass a thermostat or thermal safety with a jumper harness.
Why does the GE dryer work when a connector is reseated but fail again later?
Reseating can temporarily restore contact while leaving a weak female terminal, worn blade, broken lock, corrosion, or conductor fracture unchanged. Examine pin depth and retention, then compare contact tension using the approved gauge or procedure. The GE dryer black jumper harness WE15X25208 should be installed only when that complete jumper matches the failed connection. Replace a damaged mating terminal as directed; otherwise the new harness can overheat at the same point.
Why does a GE dryer sensor or control show an intermittent fault?
Low-voltage sensor and communication circuits can be affected by corrosion, partially seated pins, chafed insulation, moisture, or a conductor broken near a repeated bend. Confirm the sensor itself and its reference or ground path, then test the harness from endpoint to endpoint while it is de-energized. Keep meter probes from spreading small terminals. Compare the main harness and jumper branches against the wiring diagram before replacement. An intermittent code is evidence to inspect the complete circuit, not proof that the sensor or control board is defective.
Symptom and decision guide
|
Observed symptom
|
Check before ordering
|
Repair direction
|
|
Failure changes with vibration
|
Connector locks, pin retention, broken conductor, supply terminal
|
Inspect and test the de-energized circuit
|
|
Connector is dark or melted
|
Terminal tension, mating blade, load current, nearby heat
|
Repair both sides and the cause of heat
|
|
Component tests good; circuit is open
|
Branch continuity, pin position, control output, supply
|
Trace the wiring diagram endpoint to endpoint
|
|
Reseating gives temporary recovery
|
Weak terminal, worn blade, corrosion, damaged lock
|
Do not treat reseating as a completed repair
|
Related GE dryer part categories
If the damaged harness terminates at a display or machine control, inspect the GE dryer control board collection. Burned board pins and harness terminals must be evaluated together.
When the circuit connects a door, start, temperature, or selector input, review the GE dryer switch and light bulb collection. Verify the switch mechanically and electrically before replacing its wiring.
If heat damage is concentrated at a temperature device, compare the GE dryer thermostat and sensor collection. Correct airflow or abnormal heat before fitting a new harness and sensor.
Installation and safety
- Disconnect power and verify the dryer is de-energized. Photograph the complete route and label connectors that could be confused despite different positions.
- Release plugs by their locking features, replace damaged mating terminals as specified, and transfer no generic splices or altered connectors.
- Route every branch through its original clips and barriers, preserving slack at moving or service points and clearance from heat, sharp edges, and rotation.
- Inspect the installation before closing panels, then test each affected function. Recheck high-current connections for abnormal heat, odor, or discoloration.
Before-ordering checklist
|
Verify
|
What must match
|
|
Harness identity
|
Main, jumper, sensor, high-limit, motor, heater, valve, control, or interface branch
|
|
Connector match
|
Keying, pin count, terminal material, locks, labels, wire gauge, and branch length
|
|
Routing match
|
Clips, sleeves, barriers, bend points, grounding, service slack, and heat or motion clearance
|
|
Circuit condition
|
Supply, load current, mating terminals, component blades, continuity, corrosion, and root cause of overheating
|