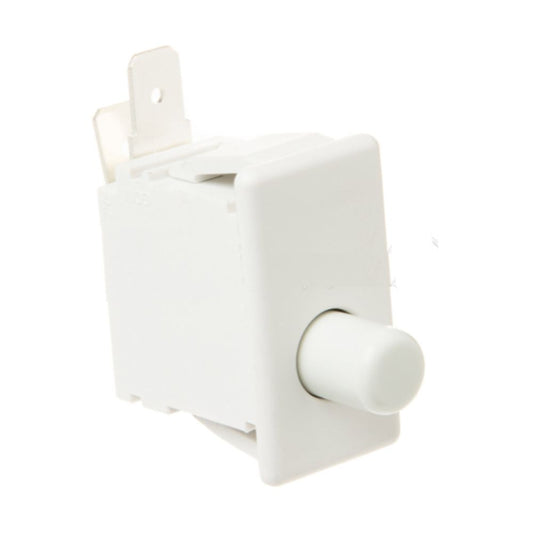
GE Dryer Switch & Light Bulb

GE Dryer Switch & Light Bulb Parts

GE dryer switches translate a physical action into an electrical input. The door switch confirms closure, the start switch requests motor operation, rotary switches select functions, and an idler or belt-related switch can stop operation when belt tension is lost. The drum lamp may share the door-switch action but remains a separate bulb-and-socket circuit on many designs.

When the dryer will not start, verify the door closes tightly, the cycle is selected, the start control is fully operated, and the supply is correct before replacing a switch. A broken button can fail to move a good switch, while a switch can click mechanically yet still have burned or open contacts. Test continuity only with power disconnected and the wires identified.

The GE dryer door switch with drum light WE04X10148 combines the door-status function with a drum-light contact arrangement on specified dryers. Match the terminal layout, actuator length, mounting method, and wiring diagram before installation.

When the lamp remains dark after a correct replacement bulb is installed, inspect the GE dryer drum light socket WE5M48 for heat discoloration, corrosion, looseness, and damaged contacts before assuming the door switch is defective.

Quick inspection sequence

  • Operate each control normally and record whether it clicks, springs back, feels loose, sticks, or changes the display without starting the dryer.
  • Inspect the door-switch actuator for scorching, a pushed-in body, broken mounting tabs, or misalignment caused by sagging door hardware.
  • With power disconnected, label wires and test the switch in each intended position. Compare the readings with the wiring diagram, not a generic switch assumption.
  • For a dark drum, inspect the bulb filament, specified wattage, socket contacts, heat damage, and whether the door-switch lamp contact changes state.
  • If the drum does not turn, inspect belt tension and the idler-switch actuator before replacing a start switch or control board.

Match the correct GE dryer switches and light bulb part

  • Match switch function first: door, start, temperature, cycle, rotary selector, idler, or other safety input.
  • Compare terminal count and labels, actuator or shaft shape, indexing, mounting tabs, body depth, and normally open or normally closed behavior.
  • For lamps, match bulb type, base, voltage, wattage, envelope size, heat rating, and any cover or socket specified for the dryer.
  • Do not substitute a switch with similar terminals. Contact ratings and internal switching sequences can differ even when the housing fits.

Common problems and repair checks

Why will the GE dryer start only when the door switch is pressed by hand?

If the dryer responds when the actuator is pressed but not when the door closes, inspect door alignment, strike engagement, switch mounting, and actuator reach. Do not bypass the switch for operation. A scorched, pushed-in, or electrically intermittent switch should be replaced with GE dryer door switch with drum light WE04X10148 only where its terminal arrangement and mounting match. If the switch tests correctly, repair the sagging hinge, worn latch, or broken switch bracket that prevents normal actuation.

Why does the GE dryer click at Start but the drum does not turn?

A click can come from the start switch or a control relay while the motor path remains open. Check the supply, door input, belt condition, thermal protections, motor wiring, and whether the drum is mechanically obstructed. On designs that monitor belt tension, a failed or unactuated GE dryer idler switch WE04X10184 can interrupt operation. Verify the idler mechanism moves the switch correctly before replacing it. A ge dryer start switch should not be condemned solely because the dryer is silent after the control is pressed.

Why is the GE dryer Start button stuck or not springing back?

The external button, panel post, return feature, or switch shaft may be broken. Disconnect power and remove the console access panel without forcing the button. Determine whether the plastic actuator is jammed while the electrical switch moves normally. The GE dryer display and buttons assembly WE04X23598 is used where the button and display structure are supplied as an assembly. It should not replace a separate electrical start switch unless the parts diagram identifies the failed piece as part of that assembly.

Why does the GE dryer ignore a temperature selection?

Confirm that the chosen cycle permits the selected temperature, then test the selector contacts and the downstream thermostat, sensor, heater, or gas circuit. A rotary control can feel normal even when one contact path is open. The GE dryer temperature selector switch WE04X24553 must match the shaft indexing, terminal map, and selected dryer design. A ge dryer starter switch or door switch for GE dryer operation will not correct a temperature-only fault.

Why does the GE dryer drum light stay dark with the door open?

Disconnect power and inspect the lamp before removing the switch. Replace a burned or broken filament with the specified GE dryer 10-watt drum light bulb WE05X20431 only when its voltage, wattage, base, and envelope match. If a known-good bulb remains dark, inspect socket WE5M48 for heat damage, corrosion, loose contacts, and supply from the door-switch lamp circuit. Do not operate a dryer that requires a lamp but has exposed or damaged socket contacts.

Symptom and decision guide

Observed symptom

Check before ordering

Repair direction

Starts only with door pressed

Door alignment, actuator, switch mount, contacts

Repair the failed mechanical or electrical link

Start clicks but drum is still

Door input, belt/idler switch, motor, safety circuit

Trace the series start path

One selector position fails

Switch contact map, controlled load, harness

Confirm input and output for that position

Drum light is dark

Bulb, socket, door-switch lamp contacts, wiring

Test from lamp outward

Related GE dryer part categories

If the door switch is not being pressed because the door sags or will not latch, inspect the GE dryer door gasket, seal, handle, hinge, latch, lock, and spring collection. Restore mechanical closure before replacing another switch.

When switch inputs test correctly but the display or commanded output remains wrong, review the GE dryer control board collection. Separate the user-interface input from the main-board output.

If continuity changes when a connector or wire is moved, compare the GE dryer wire harness collection. A loose terminal can imitate an intermittent switch.

Installation and safety

  1. Disconnect power, photograph wire positions, and label terminals before removing a switch, bulb socket, or console assembly.
  2. Release mounting tabs without bending the panel, transfer specified knobs or actuators, and route wires away from heat, the drum, and sharp edges.
  3. Use the specified lamp without exceeding its wattage. Seat the bulb and socket without overtightening or leaving exposed contacts.
  4. Restore covers and test the door interlock, start action, every switch position, drum lamp, and automatic shutdown without bypassing a safety device.

Before-ordering checklist

Verify

What must match

Switch function

Door, start, idler, temperature, cycle, rotary selector, or safety input

Contact map

Terminal labels, pin count, normal state, switching sequence, and electrical rating

Mechanical fit

Actuator or shaft, index, mounting tabs, body depth, button, and bracket

Lamp circuit

Bulb type, base, voltage, wattage, socket, cover, and door-switch contact

Search result

Show filters
1 - 40 out of 12 results found in 0.003s
Sorted by

GE dryer switches translate a physical action into an electrical input. The door switch confirms closure, the start switch requests motor operation, rotary switches select functions, and an idler or belt-related switch can stop operation when belt tension is lost. The drum lamp may share the door-switch action but remains a separate bulb-and-socket circuit on many designs.

When the dryer will not start, verify the door closes tightly, the cycle is selected, the start control is fully operated, and the supply is correct before replacing a switch. A broken button can fail to move a good switch, while a switch can click mechanically yet still have burned or open contacts. Test continuity only with power disconnected and the wires identified.

The GE dryer door switch with drum light WE04X10148 combines the door-status function with a drum-light contact arrangement on specified dryers. Match the terminal layout, actuator length, mounting method, and wiring diagram before installation.

When the lamp remains dark after a correct replacement bulb is installed, inspect the GE dryer drum light socket WE5M48 for heat discoloration, corrosion, looseness, and damaged contacts before assuming the door switch is defective.

Quick inspection sequence

  • Operate each control normally and record whether it clicks, springs back, feels loose, sticks, or changes the display without starting the dryer.
  • Inspect the door-switch actuator for scorching, a pushed-in body, broken mounting tabs, or misalignment caused by sagging door hardware.
  • With power disconnected, label wires and test the switch in each intended position. Compare the readings with the wiring diagram, not a generic switch assumption.
  • For a dark drum, inspect the bulb filament, specified wattage, socket contacts, heat damage, and whether the door-switch lamp contact changes state.
  • If the drum does not turn, inspect belt tension and the idler-switch actuator before replacing a start switch or control board.

Match the correct GE dryer switches and light bulb part

  • Match switch function first: door, start, temperature, cycle, rotary selector, idler, or other safety input.
  • Compare terminal count and labels, actuator or shaft shape, indexing, mounting tabs, body depth, and normally open or normally closed behavior.
  • For lamps, match bulb type, base, voltage, wattage, envelope size, heat rating, and any cover or socket specified for the dryer.
  • Do not substitute a switch with similar terminals. Contact ratings and internal switching sequences can differ even when the housing fits.

Common problems and repair checks

Why will the GE dryer start only when the door switch is pressed by hand?

If the dryer responds when the actuator is pressed but not when the door closes, inspect door alignment, strike engagement, switch mounting, and actuator reach. Do not bypass the switch for operation. A scorched, pushed-in, or electrically intermittent switch should be replaced with GE dryer door switch with drum light WE04X10148 only where its terminal arrangement and mounting match. If the switch tests correctly, repair the sagging hinge, worn latch, or broken switch bracket that prevents normal actuation.

Why does the GE dryer click at Start but the drum does not turn?

A click can come from the start switch or a control relay while the motor path remains open. Check the supply, door input, belt condition, thermal protections, motor wiring, and whether the drum is mechanically obstructed. On designs that monitor belt tension, a failed or unactuated GE dryer idler switch WE04X10184 can interrupt operation. Verify the idler mechanism moves the switch correctly before replacing it. A ge dryer start switch should not be condemned solely because the dryer is silent after the control is pressed.

Why is the GE dryer Start button stuck or not springing back?

The external button, panel post, return feature, or switch shaft may be broken. Disconnect power and remove the console access panel without forcing the button. Determine whether the plastic actuator is jammed while the electrical switch moves normally. The GE dryer display and buttons assembly WE04X23598 is used where the button and display structure are supplied as an assembly. It should not replace a separate electrical start switch unless the parts diagram identifies the failed piece as part of that assembly.

Why does the GE dryer ignore a temperature selection?

Confirm that the chosen cycle permits the selected temperature, then test the selector contacts and the downstream thermostat, sensor, heater, or gas circuit. A rotary control can feel normal even when one contact path is open. The GE dryer temperature selector switch WE04X24553 must match the shaft indexing, terminal map, and selected dryer design. A ge dryer starter switch or door switch for GE dryer operation will not correct a temperature-only fault.

Why does the GE dryer drum light stay dark with the door open?

Disconnect power and inspect the lamp before removing the switch. Replace a burned or broken filament with the specified GE dryer 10-watt drum light bulb WE05X20431 only when its voltage, wattage, base, and envelope match. If a known-good bulb remains dark, inspect socket WE5M48 for heat damage, corrosion, loose contacts, and supply from the door-switch lamp circuit. Do not operate a dryer that requires a lamp but has exposed or damaged socket contacts.

Symptom and decision guide

Observed symptom

Check before ordering

Repair direction

Starts only with door pressed

Door alignment, actuator, switch mount, contacts

Repair the failed mechanical or electrical link

Start clicks but drum is still

Door input, belt/idler switch, motor, safety circuit

Trace the series start path

One selector position fails

Switch contact map, controlled load, harness

Confirm input and output for that position

Drum light is dark

Bulb, socket, door-switch lamp contacts, wiring

Test from lamp outward

Related GE dryer part categories

If the door switch is not being pressed because the door sags or will not latch, inspect the GE dryer door gasket, seal, handle, hinge, latch, lock, and spring collection. Restore mechanical closure before replacing another switch.

When switch inputs test correctly but the display or commanded output remains wrong, review the GE dryer control board collection. Separate the user-interface input from the main-board output.

If continuity changes when a connector or wire is moved, compare the GE dryer wire harness collection. A loose terminal can imitate an intermittent switch.

Installation and safety

  1. Disconnect power, photograph wire positions, and label terminals before removing a switch, bulb socket, or console assembly.
  2. Release mounting tabs without bending the panel, transfer specified knobs or actuators, and route wires away from heat, the drum, and sharp edges.
  3. Use the specified lamp without exceeding its wattage. Seat the bulb and socket without overtightening or leaving exposed contacts.
  4. Restore covers and test the door interlock, start action, every switch position, drum lamp, and automatic shutdown without bypassing a safety device.

Before-ordering checklist

Verify

What must match

Switch function

Door, start, idler, temperature, cycle, rotary selector, or safety input

Contact map

Terminal labels, pin count, normal state, switching sequence, and electrical rating

Mechanical fit

Actuator or shaft, index, mounting tabs, body depth, button, and bracket

Lamp circuit

Bulb type, base, voltage, wattage, socket, cover, and door-switch contact

42 products

Part

GE Door Switch - WE01X27781
WE01X27781
$27.89 $36.26

In stock 6 Products

Quick View

In stock 6 Products

Part

GE

$27.89 $36.26
Quick View

Part

GE Door Switch WE04X29601
WE04X29601
$15.44 $20.07

In stock 0 Products

Quick View

In stock 0 Products

NLA

GE

$15.44 $20.07
Quick View

Frequently Asked Questions

Quick answers for your replacement part needs

Where can I find genuine replacement parts for my appliance?

Finding genuine replacement parts for your appliances has never been easier! We offer authentic parts for over 250 brands, including LG, Samsung, Whirlpool, Kenmore, Bosch, and Liebherr. Simply enter your appliance's model number on our website, and explore our extensive selection of compatible parts designed to restore your appliance's peak performance and reliability.

What type of appliance parts and accessories are available for purchase?

Are your replacement parts compatible with all models?

What if I can’t find the appliance part I need?

How can I track my order for appliance parts online?

How long will it take to receive my replacement parts order?

Can I return appliance parts if they are not compatible with my model?

How can I update my shipping address after placing an order?

How can I get in touch with customer support?

Couldn’t find the answer to your question?

Your satisfaction matters. Let us know how we can assist with your repair journey.

Your Cart ( 0 items)

You currently have 0 items in your Cart

Return to shop
Menu

Compatible Models