GE Dryer Door Gasket, Seal, Handles, Hinges & Latches

GE Dryer Door Gasket, Seal, Handles, Hinges & Latches Parts

A GE dryer door has several separate jobs: the hinge carries the door, the strike and latch hold it closed, the handle transfers opening force, the window and inner door contain the load, and the seal limits air leakage around the opening. A dryer that will not start may have a door-switch problem even when the door hardware looks normal, so observe both the mechanical closing action and the electrical response.

Close the empty door slowly and watch the gap around the opening. The door should approach the cabinet without lifting, twisting, or scraping, then engage with a defined click. If lifting the handle changes the alignment, inspect the hinge and its mounting structure. If the door is aligned but does not catch, inspect the strike and latch. If it latches but the dryer does not recognize the closed position, test the door switch circuit separately.

A worn strike can create a loose or unreliable closure. The GE dryer door strike WE01M10007 should be selected by the printed part number and mounting geometry, not by the shape of the opening alone. Strike depth and alignment determine how the latch engages.

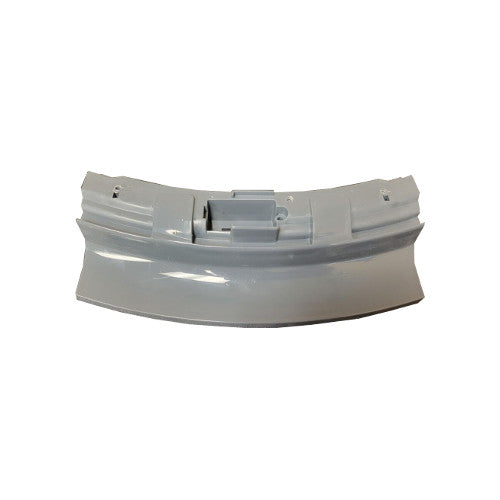
Handle design also varies across GE dryer door assemblies. The GE dryer door handle WE01X20580 is one handle configuration whose concealed posts, fastener spacing, finish, and relationship to the door trim must all match before installation.

Quick inspection sequence

  • Unload the dryer and support the door while checking vertical play at the outer edge. Movement at the hinge is different from flex in the handle or door shell.
  • Inspect the strike and latch for polished edges, cracks, missing spring tension, or a mounting hole that lets either part shift.
  • Look around the complete seal for tears, flattened sections, loose adhesive, lint channels, scorch marks, or a section pulled into the drum opening.
  • Check the inner and outer door, window, trim, and screw bosses. A cracked door shell can misalign otherwise serviceable hardware.
  • Press and release the door switch actuator by hand only with power disconnected for physical inspection; it should move freely and return consistently.

Match the correct GE dryer door gaskets, seals, handles, hinges, latches, locks, and spring part

  • Confirm the part number on the original piece or parts diagram, then match door style, color, window shape, hinge side, hole spacing, and included hardware.
  • For hinges, compare pivot offset, mounting flange, pin orientation, and whether the replacement is a bare hinge or a complete assembly.
  • For handles, verify the distance between mounting points, tab geometry, screw direction, and whether reinforcement pieces transfer with the old handle.
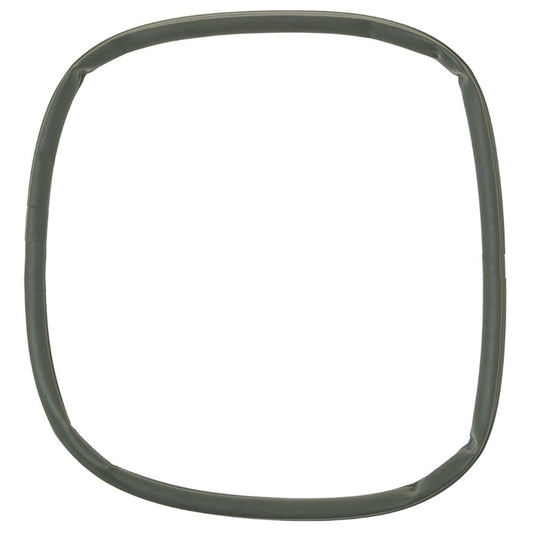
  • For seals, compare the entire perimeter profile, attachment method, joint location, and relationship to the drum opening. Do not substitute generic weather stripping.

Common problems and repair checks

Why does the GE dryer door pop open during a cycle?

A door can release when the strike is worn, the latch spring has weakened, the hinge lets the door sag, or the door shell flexes under vibration. Close the empty door slowly and pull outward near the latch without using the handle. If the strike slips out despite correct alignment, replace the worn part with GE dryer door strike WE01M10007 after confirming its mounting location. If lifting the outer edge improves engagement, correct hinge or cabinet alignment first. Do not bend the strike to compensate for a dropped door.

Why does the GE dryer door scrape the cabinet when it closes?

Scraping at the lower latch side usually indicates hinge wear, loose hinge screws, a bent hinge, or a damaged mounting surface. Support the door and check whether the pivot moves relative to the cabinet. Compare the hinge flange and pin position before ordering. If the hinge itself is bent or the pivot has excessive play, install the GE dryer hinge assembly WE01X25317 while supporting the door so the new part is not twisted during tightening. Repair cracked screw bosses or bent cabinet metal before final alignment.

Why is the GE dryer handle loose even after the screws are tightened?

A handle may feel loose when its molded posts are cracked, the inner reinforcement is broken, the wrong screw bottoms out, or the door shell is damaged. Remove power, open the door, and access the fasteners without prying the outer trim. The GE dryer white door handle WE01X20419 is a color- and geometry-specific part; compare the spacing and hidden mounting tabs. WE01X20580 represents a different handle fit path, so use only the handle assigned to the parts diagram.

Why does the GE dryer run only when the door is pushed inward?

Extra pressure can temporarily move a worn latch, misaligned strike, sagging door, or door-switch actuator far enough to close the circuit. Do not tape the switch or defeat the interlock. First verify that the door sits square and latches firmly. If the latch does not retain the strike, compare the replacement to the GE dryer door latch WE01X25316. If the mechanical closure is correct but inward pressure still changes operation, test the door switch and its mounting bracket rather than replacing more door parts.

Why is heat or lint escaping around the GE dryer door?

A torn or displaced seal, warped inner door, loose window, blocked lint path, or door that does not sit flush can open an air path. Stop using the dryer if hot air is concentrated at one point or fabric can enter the gap. Inspect the full perimeter and the inner door structure. The GE dryer outer door window WE01X10257 is appropriate only when that window panel is cracked, loose at its mounts, or unable to retain its surrounding trim. A window replacement will not correct a failed perimeter seal or a sagging hinge.

Symptom and decision guide

Observed symptom

Check before ordering

Repair direction

Door lifts at the outer edge

Hinge play, mounting screws, cabinet flange

Repair alignment before strike or latch

Door aligned but will not catch

Strike wear, latch spring, cracked latch mount

Replace the confirmed retaining part

Door latches but dryer will not start

Door switch, actuator position, wiring, power

Test the interlock circuit separately

Heat or lint escapes at one point

Seal, inner door, window, hinge alignment

Restore the complete air boundary

Related GE dryer part categories

If the door closes securely but the dryer still behaves as though it is open, inspect the GE dryer switch and light bulb collection. The door switch and its actuator are electrical safety components, not part of the strike-and-latch repair.

When a hinge, latch, or handle mount is loose because its screw, clip, or bracket has failed, compare the supporting pieces in the GE dryer hardware, fastener, and bracket collection. Restore the receiving structure instead of overtightening the door part.

If the door opening is square but the surrounding cabinet face is bent or rusted, review the GE dryer panel collection. A distorted front or side structure can prevent correct door alignment.

Installation and safety

  1. Disconnect power, unload the dryer, and support the door before loosening hinge or door-shell fasteners.
  2. Photograph screw lengths and trim orientation. Remove the door on a padded surface when the repair requires separating inner and outer sections.
  3. Transfer only specified inserts and reinforcement pieces, tighten the assembly evenly, and align the hinge before loading it with the door weight.
  4. Close and open the door repeatedly, verify full latch engagement and switch operation, then run a short empty cycle while checking for air leakage or rubbing.

Before-ordering checklist

Verify

What must match

Door construction

Solid or windowed door, inner/outer shell, color, trim, and opening direction

Closure parts

Strike profile, latch depth, spring action, lock feature, and switch actuation

Hinge geometry

Pivot offset, flange shape, hole spacing, pin direction, and cabinet condition

Seal boundary

Perimeter profile, joint location, attachment method, window seating, and door alignment

Search result

Show filters
1 - 40 out of 12 results found in 0.003s
Sorted by

A GE dryer door has several separate jobs: the hinge carries the door, the strike and latch hold it closed, the handle transfers opening force, the window and inner door contain the load, and the seal limits air leakage around the opening. A dryer that will not start may have a door-switch problem even when the door hardware looks normal, so observe both the mechanical closing action and the electrical response.

Close the empty door slowly and watch the gap around the opening. The door should approach the cabinet without lifting, twisting, or scraping, then engage with a defined click. If lifting the handle changes the alignment, inspect the hinge and its mounting structure. If the door is aligned but does not catch, inspect the strike and latch. If it latches but the dryer does not recognize the closed position, test the door switch circuit separately.

A worn strike can create a loose or unreliable closure. The GE dryer door strike WE01M10007 should be selected by the printed part number and mounting geometry, not by the shape of the opening alone. Strike depth and alignment determine how the latch engages.

Handle design also varies across GE dryer door assemblies. The GE dryer door handle WE01X20580 is one handle configuration whose concealed posts, fastener spacing, finish, and relationship to the door trim must all match before installation.

Quick inspection sequence

  • Unload the dryer and support the door while checking vertical play at the outer edge. Movement at the hinge is different from flex in the handle or door shell.
  • Inspect the strike and latch for polished edges, cracks, missing spring tension, or a mounting hole that lets either part shift.
  • Look around the complete seal for tears, flattened sections, loose adhesive, lint channels, scorch marks, or a section pulled into the drum opening.
  • Check the inner and outer door, window, trim, and screw bosses. A cracked door shell can misalign otherwise serviceable hardware.
  • Press and release the door switch actuator by hand only with power disconnected for physical inspection; it should move freely and return consistently.

Match the correct GE dryer door gaskets, seals, handles, hinges, latches, locks, and spring part

  • Confirm the part number on the original piece or parts diagram, then match door style, color, window shape, hinge side, hole spacing, and included hardware.
  • For hinges, compare pivot offset, mounting flange, pin orientation, and whether the replacement is a bare hinge or a complete assembly.
  • For handles, verify the distance between mounting points, tab geometry, screw direction, and whether reinforcement pieces transfer with the old handle.
  • For seals, compare the entire perimeter profile, attachment method, joint location, and relationship to the drum opening. Do not substitute generic weather stripping.

Common problems and repair checks

Why does the GE dryer door pop open during a cycle?

A door can release when the strike is worn, the latch spring has weakened, the hinge lets the door sag, or the door shell flexes under vibration. Close the empty door slowly and pull outward near the latch without using the handle. If the strike slips out despite correct alignment, replace the worn part with GE dryer door strike WE01M10007 after confirming its mounting location. If lifting the outer edge improves engagement, correct hinge or cabinet alignment first. Do not bend the strike to compensate for a dropped door.

Why does the GE dryer door scrape the cabinet when it closes?

Scraping at the lower latch side usually indicates hinge wear, loose hinge screws, a bent hinge, or a damaged mounting surface. Support the door and check whether the pivot moves relative to the cabinet. Compare the hinge flange and pin position before ordering. If the hinge itself is bent or the pivot has excessive play, install the GE dryer hinge assembly WE01X25317 while supporting the door so the new part is not twisted during tightening. Repair cracked screw bosses or bent cabinet metal before final alignment.

Why is the GE dryer handle loose even after the screws are tightened?

A handle may feel loose when its molded posts are cracked, the inner reinforcement is broken, the wrong screw bottoms out, or the door shell is damaged. Remove power, open the door, and access the fasteners without prying the outer trim. The GE dryer white door handle WE01X20419 is a color- and geometry-specific part; compare the spacing and hidden mounting tabs. WE01X20580 represents a different handle fit path, so use only the handle assigned to the parts diagram.

Why does the GE dryer run only when the door is pushed inward?

Extra pressure can temporarily move a worn latch, misaligned strike, sagging door, or door-switch actuator far enough to close the circuit. Do not tape the switch or defeat the interlock. First verify that the door sits square and latches firmly. If the latch does not retain the strike, compare the replacement to the GE dryer door latch WE01X25316. If the mechanical closure is correct but inward pressure still changes operation, test the door switch and its mounting bracket rather than replacing more door parts.

Why is heat or lint escaping around the GE dryer door?

A torn or displaced seal, warped inner door, loose window, blocked lint path, or door that does not sit flush can open an air path. Stop using the dryer if hot air is concentrated at one point or fabric can enter the gap. Inspect the full perimeter and the inner door structure. The GE dryer outer door window WE01X10257 is appropriate only when that window panel is cracked, loose at its mounts, or unable to retain its surrounding trim. A window replacement will not correct a failed perimeter seal or a sagging hinge.

Symptom and decision guide

Observed symptom

Check before ordering

Repair direction

Door lifts at the outer edge

Hinge play, mounting screws, cabinet flange

Repair alignment before strike or latch

Door aligned but will not catch

Strike wear, latch spring, cracked latch mount

Replace the confirmed retaining part

Door latches but dryer will not start

Door switch, actuator position, wiring, power

Test the interlock circuit separately

Heat or lint escapes at one point

Seal, inner door, window, hinge alignment

Restore the complete air boundary

Related GE dryer part categories

If the door closes securely but the dryer still behaves as though it is open, inspect the GE dryer switch and light bulb collection. The door switch and its actuator are electrical safety components, not part of the strike-and-latch repair.

When a hinge, latch, or handle mount is loose because its screw, clip, or bracket has failed, compare the supporting pieces in the GE dryer hardware, fastener, and bracket collection. Restore the receiving structure instead of overtightening the door part.

If the door opening is square but the surrounding cabinet face is bent or rusted, review the GE dryer panel collection. A distorted front or side structure can prevent correct door alignment.

Installation and safety

  1. Disconnect power, unload the dryer, and support the door before loosening hinge or door-shell fasteners.
  2. Photograph screw lengths and trim orientation. Remove the door on a padded surface when the repair requires separating inner and outer sections.
  3. Transfer only specified inserts and reinforcement pieces, tighten the assembly evenly, and align the hinge before loading it with the door weight.
  4. Close and open the door repeatedly, verify full latch engagement and switch operation, then run a short empty cycle while checking for air leakage or rubbing.

Before-ordering checklist

Verify

What must match

Door construction

Solid or windowed door, inner/outer shell, color, trim, and opening direction

Closure parts

Strike profile, latch depth, spring action, lock feature, and switch actuation

Hinge geometry

Pivot offset, flange shape, hole spacing, pin direction, and cabinet condition

Seal boundary

Perimeter profile, joint location, attachment method, window seating, and door alignment

63 products

Part

GE Dryer Door Catch WE01X25316
WE01X25316
$19.58 $25.46

In stock 20 Products

Quick View

In stock 20 Products

Part

GE

$19.58 $25.46
Quick View

Part

GE Door Latch WE01X29738
WE01X29738
$9.95 $16.95

In stock 61 Products

Quick View

In stock 61 Products

Part

GE

$9.95 $16.95
Quick View

Part

GE Dryer Door Assembly - WE10X23891
WE10X23891
$173.95 $226.14

In stock 18 Products

Quick View

In stock 18 Products

NLA

GE

$173.95 $226.14
Quick View

Part

GE Part# WE1M1011 Door Latch (OEM)
WE1M1011
$7.95 $14.95

In stock 50 Products

Quick View

In stock 50 Products

Part

GE

$7.95 $14.95
Quick View

Part

GE Dryer Door Strike - WE1X1192
WE1X1192
$5.95 $12.95

In stock 54 Products

Quick View

In stock 54 Products

Part

GE

$5.95 $12.95
Quick View

Part

GE Outer Door Assembly (White) WE10X26855
WE10X26855
$101.62 $132.11

In stock 0 Products

Quick View

In stock 0 Products

Part

GE

$101.62 $132.11
Quick View

Part

GE Washers and Dryer Door Handle - White WE01X20419
WE01X20419
$18.95 $24.64

In stock 93 Products

Quick View

In stock 93 Products

Part

GE

$18.95 $24.64
Quick View

Part

GE Washers and Dryer Door Strike WE01M10007
WE01M10007
$9.95 $12.94

In stock 12 Products

Quick View

In stock 12 Products

Part

GE

$9.95 $12.94
Quick View

Part

Ge Handle Spacer Fl Dryer - WE01X35017
WE01X35017
$6.95 $9.05

In stock 9 Products

Quick View

In stock 9 Products

Part

GE

$6.95 $9.05
Quick View

Part

Ge Hinge Asm - WE01X25317
WE01X25317
$35.06 $42.06

In stock 41 Products

Quick View

In stock 41 Products

Part

GE

$35.06 $42.06
Quick View

Part

GE Part# WE01X31005 Door Hinge - Genuine OEM
WE01X31005
$18.57 $24.15

In stock 0 Products

Quick View

In stock 0 Products

Part

GE

$18.57 $24.15
Quick View

Part

GE Door Assembly WE10X27467
WE10X27467
$236.95 $308.04

In stock 5 Products

Quick View

In stock 5 Products

Part

GE

$236.95 $308.04
Quick View

Part

GE Outer Door WIndow WE01X25534
WE01X25534
$58.47 $76.02

In stock 3 Products

Quick View

In stock 3 Products

Part

GE

$58.47 $76.02
Quick View

Part

GE Latch WE01X31004
WE01X31004
$15.95 $22.95

In stock 13 Products

Quick View

In stock 13 Products

Part

GE

$15.95 $22.95
Quick View

Part

GE Washers and Dryer Painted Door Handle WE1M1107
WE1M1107
$77.70 $101.01

In stock 0 Products

Quick View

In stock 0 Products

Part

GE

$77.70 $101.01
Quick View

Part

Ge Hinge Asm - WE01X34338
WE01X34338
$38.95 $50.64

In stock 1 Products

Quick View

In stock 1 Products

Part

GE

$38.95 $50.64
Quick View

Part

Ge Spring (Idler) - WE02X10085
WE02X10085
$7.95 $10.34

In stock 0 Products

Quick View

In stock 0 Products

Part

GE

$7.95 $10.34
Quick View

Part

Ge Door Latch - WE01X29738
WE01X29738
$9.95 $16.95

In stock 61 Products

Quick View

In stock 61 Products

Part

GE

$9.95 $16.95
Quick View

Part

Ge Latch - WE01X31004
WE01X31004
$15.95 $22.95

In stock 13 Products

Quick View

In stock 13 Products

Part

GE

$15.95 $22.95
Quick View

Part

WE10X33131
$137.95 $179.34

In stock 1 Products

Quick View

In stock 1 Products

Part

GE

$137.95 $179.34
Quick View

Frequently Asked Questions

Quick answers for your replacement part needs

Where can I find genuine replacement parts for my appliance?

Finding genuine replacement parts for your appliances has never been easier! We offer authentic parts for over 250 brands, including LG, Samsung, Whirlpool, Kenmore, Bosch, and Liebherr. Simply enter your appliance's model number on our website, and explore our extensive selection of compatible parts designed to restore your appliance's peak performance and reliability.

What type of appliance parts and accessories are available for purchase?

Are your replacement parts compatible with all models?

What if I can’t find the appliance part I need?

How can I track my order for appliance parts online?

How long will it take to receive my replacement parts order?

Can I return appliance parts if they are not compatible with my model?

How can I update my shipping address after placing an order?

How can I get in touch with customer support?

Couldn’t find the answer to your question?

Your satisfaction matters. Let us know how we can assist with your repair journey.

Your Cart ( 0 items)

You currently have 0 items in your Cart

Return to shop
Menu

Compatible Models