GE Dryer Panel

GE Dryer Panel Parts

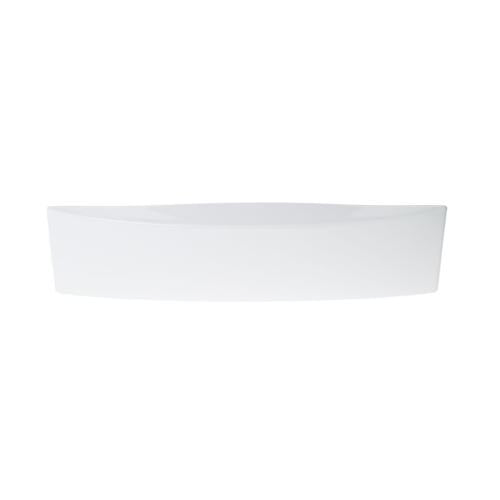
A GE dryer panel may be a structural cabinet piece, a removable service cover, or the console that supports knobs, buttons, labels, and electronic displays. A dented side panel is different from a cracked control panel: one mainly encloses and aligns the cabinet, while the other may prevent a switch or button from being operated correctly. Identify the panel's job before connecting an operating symptom to it.

Inspect the dryer with power disconnected. Look for impact damage, rust, loose seams, missing screws, sharp edges, broken control mounts, and gaps where the cabinet no longer sits square. A panel that merely has a cosmetic scratch may not require replacement. A panel that rubs the drum, exposes wiring, will not retain controls, blocks airflow, or leaves the cabinet unstable should be corrected before operation.

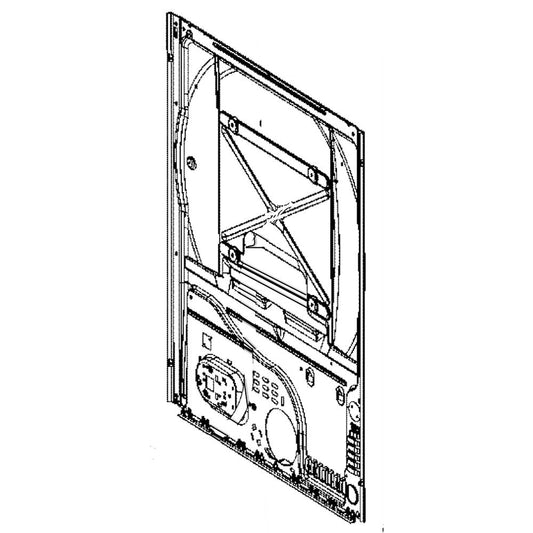
The GE dryer rear panel WE19M1481 is a rear enclosure part for specified dryers. Match its dimensions, vent and service openings, embossments, screw pattern, and finish. A rear panel should never be drilled or trimmed to fit because openings and clearances protect wiring, airflow, and grounded metal parts.

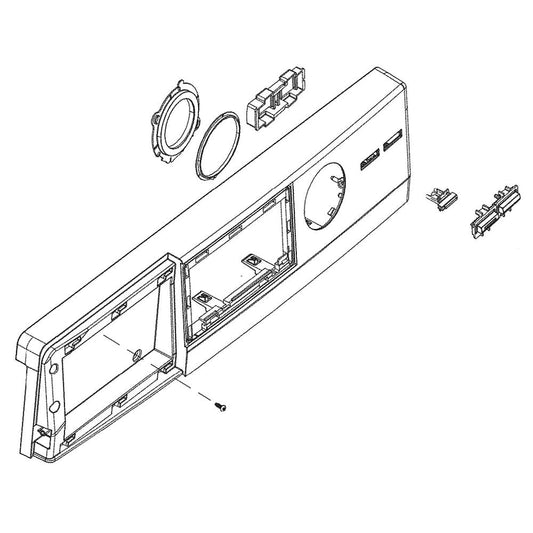
Console construction is equally specific. The GE dryer control panel WE19M1490 uses a defined backsplash, overlay, control-opening, and mounting arrangement that must match the dryer rather than merely resembling the original from the front.

Quick inspection sequence

  • Determine whether the damaged piece is the control console, backsplash, top, front, rear, side, toe, access, or internal mounting panel.
  • Check whether the panel supports switches, boards, wire clips, ducts, hinges, or grounding points. Photograph every attached component before removal.
  • Sight along cabinet seams for twist. Measure gaps at the top, front, and rear before assuming the replacement panel alone will restore alignment.
  • Inspect screw holes, tabs, folded edges, and mating panels for damage. A new panel will not stay secure in a stripped or bent receiving structure.
  • For a noisy cabinet, confirm that the sound changes with pressure on the stationary panel and is not synchronized with drum rotation.

Match the correct GE dryer panel part

  • Use the exact handle and compare panel position, appliance width, finish, color code, edge folds, openings, embossments, and complete mounting pattern.
  • For control panels, compare printed legends, knob and display openings, button layout, board mounts, harness clips, and included overlays.
  • Confirm whether insulation, seals, brackets, clips, or control components transfer from the original panel or are included with the replacement.
  • Do not substitute a visually similar panel. Small differences can interfere with door alignment, venting, grounding, controls, or service access.

Common problems and repair checks

Why does the GE dryer panel rattle after the dryer warms up?

Heat can change clearances at a loose screw, relaxed clip, warped flange, or panel that touches the vent. Run an empty cycle briefly and note whether pressure on the stationary panel changes the sound. Unplug the dryer and inspect mounting points, witness marks, and cabinet level. If the rear enclosure is bent or its screw flanges no longer sit flat, GE dryer rear panel WE19M1481 may restore the correct geometry for its listed dryer. A repeating rotation-timed noise should be traced to drum components instead.

Why are GE dryer buttons difficult to press after the console cracked?

A cracked console can let the button actuator move sideways, hold a switch down, or shift the display board away from its intended supports. Remove power and inspect the plastic posts, button openings, switch shafts, and board mounts. The GE dryer control panel WE19M1486 houses the selection controls for specified designs. WE19M1490 uses a different backsplash and overlay arrangement. Match graphics, openings, color, mounting points, and the components that transfer before ordering.

Why is the GE dryer side panel hot or discolored?

Some cabinet warmth is normal, but a new localized hot spot, scorched paint, or odor requires the dryer to be stopped and inspected. Check vent restriction, heater or burner containment, seals, wiring, and internal clearance before replacing sheet metal. A dented GE dryer white side panel WE20X20406 can be replaced when it pushes inward or prevents secure enclosure, but a new panel does not correct the heat source. Restore airflow and component clearance before returning the dryer to service.

Why will a replacement GE dryer side panel not sit flush?

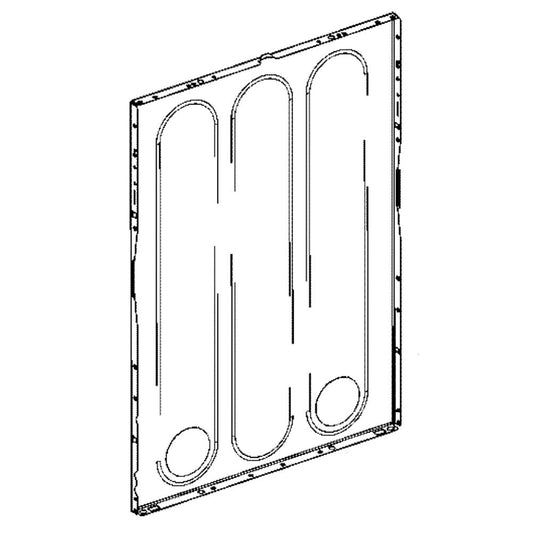
The cabinet may be out of square, a locating tab may be outside its slot, a front or rear flange may be bent, insulation may be trapped, or the wrong panel may have been selected. Compare the old and new pieces on a flat surface without forcing either one. The GE dryer side panel WE20X23867 must match side, finish, hole pattern, and folded-edge geometry. Start all fasteners loosely, seat tabs in sequence, then tighten evenly. Forcing the panel can strip holes and create a persistent rattle.

Why does the GE dryer top panel shift when items are placed on it?

A top panel can move when rear clips are not engaged, front tabs are bent, screws are missing, or the cabinet beneath it is twisted. Remove objects and discontinue use if the panel exposes wiring or can contact controls. Inspect the attachment points and compare the panel's underside before replacement. The GE dryer top panel WE10X30585 is finish- and geometry-specific. Do not rely on the top panel to pull misaligned side panels together, and do not place heavy items on the dryer during the final alignment test.

Symptom and decision guide

Observed symptom

Check before ordering

Repair direction

Stationary panel buzz

Fasteners, clips, level, vent contact, warped flange

Secure or replace the confirmed panel point

Buttons bind or miss switches

Console posts, actuators, board mounts, overlay

Repair panel support before electronics

Localized heat or discoloration

Airflow, heater/burner, wiring, internal clearance

Correct the heat source first

Panel will not sit flush

Wrong side, tabs, mating flanges, cabinet square

Align the cabinet without forcing the panel

Related GE dryer part categories

If the panel is loose because clips, screws, or supporting brackets are missing, inspect the GE dryer hardware, fastener, and bracket collection. Use the specified mounting pieces rather than larger substitute screws.

When the control panel is intact but the display resets or commands are wrong, review the GE dryer control board collection. A structural console and an electronic control are separate parts even when mounted together.

If a front-panel gap is caused by a sagging door or hinge, compare the GE dryer door gasket, seal, handle, hinge, latch, lock, and spring collection. Door alignment should be corrected before judging cabinet fit.

Installation and safety

  1. Disconnect power, shut off gas if the appliance must be moved, and protect the floor and panel finish. Photograph wires, clips, insulation, and attached controls.
  2. Support adjoining panels while releasing screws and tabs. Transfer only specified brackets, overlays, buttons, sealffvfrers, and harness retainers.
  3. Seat locating tabs and folded edges before tightening. Start every fastener loosely, confirm the cabinet is square, then tight 
  4. en in a balanced sequence.
  5. Restore grounding points, wire and vent clearance, and all service covers. Test controls, door alignment, airflow, and cabinet noise during a short empty cycle.

Before-ordering checklist

Verify

What must match

Panel position

Control, backsplash, top, front, rear, side, toe, access, or internal support

Visible match

Color, finish, printed legends, openings, edge folds, embossments, and overall dimensions

Mounting match

Tabs, holes, brackets, board posts, harness clips, seals, insulation, and grounding points

Cabinet condition

Square frame, undamaged mating flanges, vent clearance, door alignment, and corrected heat source

Search result

Show filters
1 - 40 out of 12 results found in 0.003s
Sorted by

A GE dryer panel may be a structural cabinet piece, a removable service cover, or the console that supports knobs, buttons, labels, and electronic displays. A dented side panel is different from a cracked control panel: one mainly encloses and aligns the cabinet, while the other may prevent a switch or button from being operated correctly. Identify the panel's job before connecting an operating symptom to it.

Inspect the dryer with power disconnected. Look for impact damage, rust, loose seams, missing screws, sharp edges, broken control mounts, and gaps where the cabinet no longer sits square. A panel that merely has a cosmetic scratch may not require replacement. A panel that rubs the drum, exposes wiring, will not retain controls, blocks airflow, or leaves the cabinet unstable should be corrected before operation.

The GE dryer rear panel WE19M1481 is a rear enclosure part for specified dryers. Match its dimensions, vent and service openings, embossments, screw pattern, and finish. A rear panel should never be drilled or trimmed to fit because openings and clearances protect wiring, airflow, and grounded metal parts.

Console construction is equally specific. The GE dryer control panel WE19M1490 uses a defined backsplash, overlay, control-opening, and mounting arrangement that must match the dryer rather than merely resembling the original from the front.

Quick inspection sequence

  • Determine whether the damaged piece is the control console, backsplash, top, front, rear, side, toe, access, or internal mounting panel.
  • Check whether the panel supports switches, boards, wire clips, ducts, hinges, or grounding points. Photograph every attached component before removal.
  • Sight along cabinet seams for twist. Measure gaps at the top, front, and rear before assuming the replacement panel alone will restore alignment.
  • Inspect screw holes, tabs, folded edges, and mating panels for damage. A new panel will not stay secure in a stripped or bent receiving structure.
  • For a noisy cabinet, confirm that the sound changes with pressure on the stationary panel and is not synchronized with drum rotation.

Match the correct GE dryer panel part

  • Use the exact handle and compare panel position, appliance width, finish, color code, edge folds, openings, embossments, and complete mounting pattern.
  • For control panels, compare printed legends, knob and display openings, button layout, board mounts, harness clips, and included overlays.
  • Confirm whether insulation, seals, brackets, clips, or control components transfer from the original panel or are included with the replacement.
  • Do not substitute a visually similar panel. Small differences can interfere with door alignment, venting, grounding, controls, or service access.

Common problems and repair checks

Why does the GE dryer panel rattle after the dryer warms up?

Heat can change clearances at a loose screw, relaxed clip, warped flange, or panel that touches the vent. Run an empty cycle briefly and note whether pressure on the stationary panel changes the sound. Unplug the dryer and inspect mounting points, witness marks, and cabinet level. If the rear enclosure is bent or its screw flanges no longer sit flat, GE dryer rear panel WE19M1481 may restore the correct geometry for its listed dryer. A repeating rotation-timed noise should be traced to drum components instead.

Why are GE dryer buttons difficult to press after the console cracked?

A cracked console can let the button actuator move sideways, hold a switch down, or shift the display board away from its intended supports. Remove power and inspect the plastic posts, button openings, switch shafts, and board mounts. The GE dryer control panel WE19M1486 houses the selection controls for specified designs. WE19M1490 uses a different backsplash and overlay arrangement. Match graphics, openings, color, mounting points, and the components that transfer before ordering.

Why is the GE dryer side panel hot or discolored?

Some cabinet warmth is normal, but a new localized hot spot, scorched paint, or odor requires the dryer to be stopped and inspected. Check vent restriction, heater or burner containment, seals, wiring, and internal clearance before replacing sheet metal. A dented GE dryer white side panel WE20X20406 can be replaced when it pushes inward or prevents secure enclosure, but a new panel does not correct the heat source. Restore airflow and component clearance before returning the dryer to service.

Why will a replacement GE dryer side panel not sit flush?

The cabinet may be out of square, a locating tab may be outside its slot, a front or rear flange may be bent, insulation may be trapped, or the wrong panel may have been selected. Compare the old and new pieces on a flat surface without forcing either one. The GE dryer side panel WE20X23867 must match side, finish, hole pattern, and folded-edge geometry. Start all fasteners loosely, seat tabs in sequence, then tighten evenly. Forcing the panel can strip holes and create a persistent rattle.

Why does the GE dryer top panel shift when items are placed on it?

A top panel can move when rear clips are not engaged, front tabs are bent, screws are missing, or the cabinet beneath it is twisted. Remove objects and discontinue use if the panel exposes wiring or can contact controls. Inspect the attachment points and compare the panel's underside before replacement. The GE dryer top panel WE10X30585 is finish- and geometry-specific. Do not rely on the top panel to pull misaligned side panels together, and do not place heavy items on the dryer during the final alignment test.

Symptom and decision guide

Observed symptom

Check before ordering

Repair direction

Stationary panel buzz

Fasteners, clips, level, vent contact, warped flange

Secure or replace the confirmed panel point

Buttons bind or miss switches

Console posts, actuators, board mounts, overlay

Repair panel support before electronics

Localized heat or discoloration

Airflow, heater/burner, wiring, internal clearance

Correct the heat source first

Panel will not sit flush

Wrong side, tabs, mating flanges, cabinet square

Align the cabinet without forcing the panel

Related GE dryer part categories

If the panel is loose because clips, screws, or supporting brackets are missing, inspect the GE dryer hardware, fastener, and bracket collection. Use the specified mounting pieces rather than larger substitute screws.

When the control panel is intact but the display resets or commands are wrong, review the GE dryer control board collection. A structural console and an electronic control are separate parts even when mounted together.

If a front-panel gap is caused by a sagging door or hinge, compare the GE dryer door gasket, seal, handle, hinge, latch, lock, and spring collection. Door alignment should be corrected before judging cabinet fit.

Installation and safety

  1. Disconnect power, shut off gas if the appliance must be moved, and protect the floor and panel finish. Photograph wires, clips, insulation, and attached controls.
  2. Support adjoining panels while releasing screws and tabs. Transfer only specified brackets, overlays, buttons, sealffvfrers, and harness retainers.
  3. Seat locating tabs and folded edges before tightening. Start every fastener loosely, confirm the cabinet is square, then tight 
  4. en in a balanced sequence.
  5. Restore grounding points, wire and vent clearance, and all service covers. Test controls, door alignment, airflow, and cabinet noise during a short empty cycle.

Before-ordering checklist

Verify

What must match

Panel position

Control, backsplash, top, front, rear, side, toe, access, or internal support

Visible match

Color, finish, printed legends, openings, edge folds, embossments, and overall dimensions

Mounting match

Tabs, holes, brackets, board posts, harness clips, seals, insulation, and grounding points

Cabinet condition

Square frame, undamaged mating flanges, vent clearance, door alignment, and corrected heat source

40 products

Part

WE10X33198
$83.95 $90.95

In stock 2 Products

Quick View

In stock 2 Products

Part

GE

$83.95 $90.95
Quick View

Part

GE Part# WE19M1714 Backsplash Graphics Assembly (OEM)
WE19M1714
$388.95 $505.64

In stock 0 Products

Quick View

In stock 0 Products

NLA

GE

$388.95 $505.64
Quick View

Part

GE Part# WE19M1671 Backsplash Assembly and Graphics (OEM) White
WE19M1671
$127.95 $170.12

In stock 0 Products

Quick View

In stock 0 Products

NLA

GE

$127.95 $170.12
Quick View

Part

GE Part# WE19M1678 Backsplash Assembly and Graphics (OEM) White
WE19M1678
$198.71 $258.33

In stock 6 Products

Quick View

In stock 6 Products

Part

GE

$198.71 $258.33
Quick View

Part

GE Part# WE19M1481 Panel (OEM) Rear
WE19M1481
$57.95 $75.34

In stock 0 Products

Quick View

In stock 0 Products

Part

GE

$57.95 $75.34
Quick View

Part

GE Part# WE19M1488 Control Panel Assembly (OEM) White
WE19M1488
$156.95 $204.04

In stock 0 Products

Quick View

In stock 0 Products

NLA

GE

$156.95 $204.04
Quick View

Part

GE Part# WE19M1680 Backsplash Assembly (OEM) White
WE19M1680
$123.89 $161.06

In stock 0 Products

Quick View

In stock 0 Products

NLA

GE

$123.89 $161.06
Quick View

Part

GE Part# WE19M1502 Backsplash and Control Panel Assembly (OEM)
WE19M1502
$138.95 $180.64

In stock 0 Products

Quick View

In stock 0 Products

NLA

GE

$138.95 $180.64
Quick View

Part

GE Washers and Dryer  Backsplash Control Panel WE19M1492
WE19M1492
$194.95 $201.95

In stock 7 Products

Quick View

In stock 7 Products

Part

GE

$194.95 $201.95
Quick View

Part

GE Part# WE20X25563 Imd And Backsplash Assembly (OEM)
WE20X25563
$138.89 $145.89

In stock 0 Products

Quick View

In stock 0 Products

Part

GE

$138.89 $145.89
Quick View

Part

GE Part# WE20X23867 Panel Side (OEM)
WE20X23867
$69.70 $90.61

In stock 13 Products

Quick View

In stock 13 Products

NLA

GE

$69.70 $90.61
Quick View

Part

GE Part# WE19X22614 Control Panell and Backsplash Assembly (OEM)
WE19X22614
$187.54 $243.80

In stock 4 Products

Quick View

In stock 4 Products

Part

GE

$187.54 $243.80
Quick View

Part

GE Part# WE19X21074 Control Panel Shell-Backsplash Graphic Assembly - White (OEM)
WE19X21074
$90.95 $118.24

In stock 0 Products

Quick View

In stock 0 Products

NLA

GE

$90.95 $118.24
Quick View

Part

GE Part# WE20X20406 Side Panel (OEM) White
WE20X20406
$41.89

In stock 0 Products

Quick View

In stock 0 Products

NLA

GE

$41.89
Quick View

Part

GE Panel Front Riser Assembly Wh - WH46X10291
WH46X10291
$41.89 $48.89

In stock 0 Products

Quick View

In stock 0 Products

Part

GE

$41.89 $48.89
Quick View

Part

GE Dryer Panel Rear - WE02X25274
WE02X25274
$97.89 $127.26

In stock 0 Products

Quick View

In stock 0 Products

Part

GE

$97.89 $127.26
Quick View

Part

GE Part# WE20X27466 Panel Assembly (OEM) Front
WE20X27466
$132.95 $172.84

In stock 2 Products

Quick View

In stock 2 Products

Part

GE

$132.95 $172.84
Quick View

Part

GE Dryer Panel Side - WE20X26817
WE20X26817
$90.95 $118.25

In stock 11 Products

Quick View

In stock 11 Products

Part

GE

$90.95 $118.25
Quick View

Part

GE Dryer Imd And Backsplash Assembly - WE03X26824
WE03X26824
$228.45 $235.45

In stock 3 Products

Quick View

In stock 3 Products

Part

GE

$228.45 $235.45
Quick View

Part

GE Control Panel - WE22X28745
WE22X28745
$93.95 $122.14

In stock 0 Products

Quick View

In stock 0 Products

Part

GE

$93.95 $122.14
Quick View

Frequently Asked Questions

Quick answers for your replacement part needs

Where can I find genuine replacement parts for my appliance?

Finding genuine replacement parts for your appliances has never been easier! We offer authentic parts for over 250 brands, including LG, Samsung, Whirlpool, Kenmore, Bosch, and Liebherr. Simply enter your appliance's model number on our website, and explore our extensive selection of compatible parts designed to restore your appliance's peak performance and reliability.

What type of appliance parts and accessories are available for purchase?

Are your replacement parts compatible with all models?

What if I can’t find the appliance part I need?

How can I track my order for appliance parts online?

How long will it take to receive my replacement parts order?

Can I return appliance parts if they are not compatible with my model?

How can I update my shipping address after placing an order?

How can I get in touch with customer support?

Couldn’t find the answer to your question?

Your satisfaction matters. Let us know how we can assist with your repair journey.

Your Cart ( 0 items)

You currently have 0 items in your Cart

Return to shop
Menu

Compatible Models