Long drying time, lint remaining on clothes, lint collecting around the door, or a screen that will not sit flush can point to a dirty, coated, torn, warped, or mismatched GE dryer filter. Clean visible lint after every load and inspect the complete frame. The filter must seal its assigned opening without rocking or leaving a bypass gap.
Mesh can look clean while fabric-softener residue blocks airflow. Hold the screen under running water as a check only after removing it from the dryer. If water beads and pools instead of passing through, wash the screen with warm soapy water, rinse it completely, and dry it before reinstallation. Replace torn mesh or a distorted frame rather than patching the opening.
Lint around a filter does not always mean the screen itself failed. Inspect the filter housing, duct, seals, guide rails, and the area beneath the screen for debris that prevents full seating. A cracked or missing cover can change the way the screen is retained. Disconnect power before reaching below the filter opening because sheet-metal edges can be sharp.
Quick inspection sequence
- Remove the filter and clean the mesh. Hold it toward a bright light to find tears, plugged sections, separated seams, and residue across the weave.
- Place the filter on a flat surface and check for a twisted frame, bowed edge, broken handle, loose screen, or missing seal.
- Inspect both guide rails and the bottom stop. Packed lint or a foreign object can keep a correct filter from seating completely.
- Use a flashlight to inspect the housing and duct for a cracked lip, damaged cover, displaced seal, or polished marks showing filter movement.
- With power disconnected, remove accessible lint below the opening using an appliance brush or vacuum hose without pushing debris farther into the blower path.
- Check the exhaust duct and outside damper when drying remains slow after the filter is clean. The filter is only one section of the airflow system.
Match the correct GE dryer filter part
- Match the complete filter part number, not only the approximate outline. Small changes in frame depth or sealing edge can create a lint bypass.
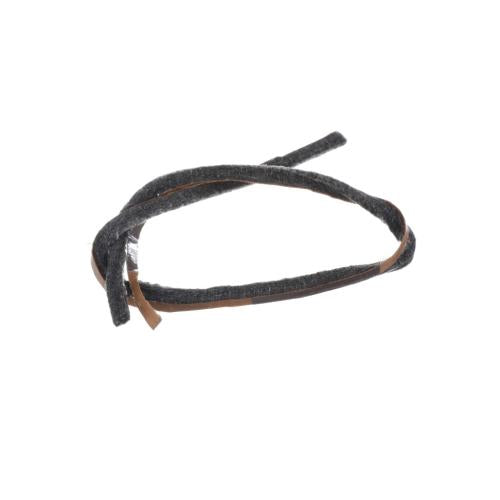
- Compare length, width, thickness, corner shape, handle position, mesh area, guide tabs, bottom stop, cover, and any gasket or felt edge.
- Determine whether the listing contains a bare screen, complete filter assembly, screen and cover, housing, or guide component.
- Inspect the receiving duct before ordering. A new filter cannot seat correctly in a cracked, warped, or debris-packed housing.
Common problems and repair checks
Why does the GE dryer take longer to dry even after the lint is removed?
Wash the removable screen with warm soapy water if residue blocks the mesh, then inspect the exhaust duct, outside damper, blower path, and load size. A clean-looking filter can remain air-restrictive when conditioner coats the weave. If the frame is warped or the mesh has collapsed, replace it with the GE dryer lint filter WE18X25102 only when its frame and sealing edges match the opening. Do not run the dryer without a filter as a comparison because lint can enter the duct and blower.
Why is lint getting past the GE dryer filter?
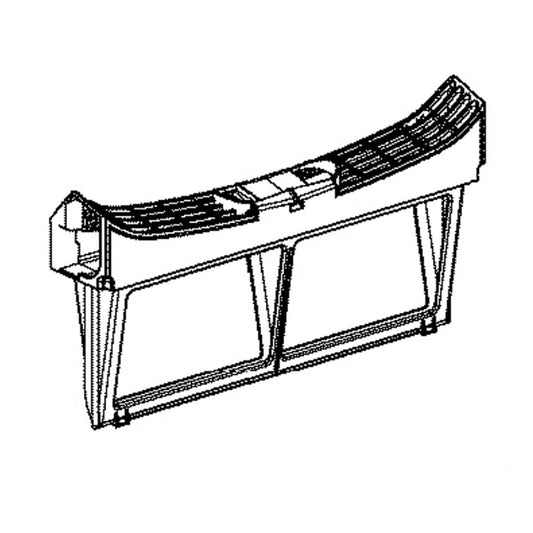
Inspect for torn mesh, a separated screen edge, warped frame, missing seal, cracked housing, or debris that holds the filter above its stop. Look for lint trails around one edge because they identify the bypass point. If the complete filter assembly is damaged, compare the original with the GE dryer lint filter assembly WE03X23881. A filter that looks similar but is slightly shallow can leave a continuous gap, so match the handle, rails, lower stop, and perimeter shape by part number.
Why will the GE dryer lint filter not slide all the way into place?
Do not force the screen. Remove packed lint and foreign objects from the guide rails with power disconnected, then inspect the frame for a bowed corner and the housing for a bent lip. Compare the filter orientation and handle position. If the old frame has twisted from heat or impact, the GE dryer lint filter WE16X29397 should be used only when its tabs and depth match the receiving duct. Forcing the wrong screen can crack the housing and create a larger bypass path.
Why does the GE dryer filter keep lifting or rattling during a cycle?
A filter can move when its frame is warped, the cover or retainer is broken, the lower stop is missing, airflow is abnormal, or a heavy object has bent the screen. Check witness marks and make sure the opening is not packed with lint. If the assigned design uses the GE dryer filter assembly WE18X54, compare the complete frame and retention points rather than transferring a loose screen into an old frame. Correct excessive cabinet vibration and filter-housing damage before the final fit test.
Symptom and decision guide
|
Observed symptom
|
Check before ordering
|
Repair direction
|
|
Slow drying with coated mesh
|
Water passage, residue, vent and damper
|
Wash, dry, and retest airflow
|
|
Lint trail around one edge
|
Tear, warped frame, seal, housing lip
|
Restore the confirmed bypass point
|
|
Filter stops before seating
|
Guide debris, wrong orientation, bowed frame
|
Disconnect power and clear the receiving path
|
|
Screen lifts or rattles
|
Retainer, lower stop, frame, vibration
|
Repair retention rather than forcing the screen
|
Related GE dryer part categories
When the filter is clean but drying remains slow, inspect the GE dryer grille, vent, hose, and tube collection. A kinked or obstructed exhaust path can limit airflow beyond the screen.
If debris has damaged the blower or airflow remains weak at the dryer outlet, compare the GE dryer motor, fan, blower, pump, and valve collection. Confirm the blower path before replacing another filter.
When heat has warped the filter frame or cover, review the GE dryer heating element, burner, coil, and igniter collection. Correct abnormal heat and airflow before installing the new filter.
Installation and safety
- Disconnect power before cleaning below the filter opening or removing housing parts. Wear gloves around unfinished sheet-metal edges.
- Vacuum accessible lint from the guides and duct without pushing it into the blower. Clean any reusable screen and let it dry completely.
- Insert the matched filter in the correct orientation without bending the frame. Confirm the handle, stops, cover, and sealing edges sit flush.
- Restore power and check airflow at the outside damper during a short cycle. Reinspect the filter for movement, lint trails, or heat distortion.
Before-ordering checklist
|
Verify
|
What must match
|
|
Filter identity
|
Full part number, screen or assembly type, handle location, frame color, and included cover
|
|
Frame geometry
|
Length, width, depth, corners, rails, tabs, lower stop, perimeter seal, and mesh area
|
|
Receiving path
|
Clean guides, sound housing lip, intact duct, no foreign object, and full flush seating
|
|
Airflow result
|
Clean mesh, open exhaust, operating outside damper, stable filter, and no lint bypass trail
|