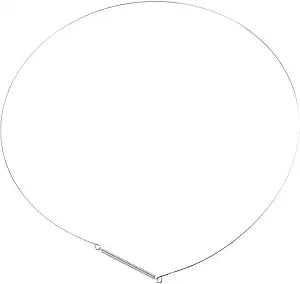
GE Washer Gaskets and Seals

GE Washer Gaskets and Seals Parts

A ge washer gaskets and seals fault should be diagnosed from the exact function that stopped, the conditions that trigger it, and the surrounding parts that may be loading or misaligning the component. This collection includes door boots and bellows, tub and shaft seals, water-valve gaskets, hose and dispenser seals, and retaining clamps and sealing rings. Similar-looking pieces can operate at different ratings or sit in different positions, so appearance is only a secondary check after the complete part number is known.

Begin with the machine disconnected from power and document the symptom before moving anything. Inspect tears in folds, hardened lips, mineral tracks, rust near clamps, mold that returns after cleaning, stretched retaining bands, cuts from trapped items, and leaks at shaft or valve joints. Replacement becomes reasonable when the defect is repeatable, the failed surface or electrical measurement is confirmed, or the part can no longer hold its specified position. Avoid replacing the category part solely because the appliance displays a broad symptom.

Determine what failed before replacing the part

Separate a component failure from an installation, supply, control, or adjacent-part problem. In this category, the part must keep wash water inside the tub, door opening, valve joints, dispenser path, shaft area, and connected hoses while allowing designed movement. Record when the symptom begins, which direction or cycle is active, whether temperature or load changes it, and whether the fault disappears after cooling or repositioning. Those observations narrow the diagnosis without bypassing a safety device.

For ge washer gaskets and seals, inspect the complete mechanical and electrical path. A loose mount, obstructed air or water path, shifted seal, damaged harness, or incorrect command can make a sound component look defective. Review the GE washer drums and tubs when the evidence points beyond the selected category.

When replacement is actually needed

Replace the identified part when cracks, deformation, open windings, leakage, burned terminals, loss of calibrated response, excessive play, or another confirmed defect prevents its normal function. A small leak can reach bearings, motors, wiring, flooring, or cabinet seams and may grow rapidly during spin. Stop use when movement, water, heat, or electricity can extend the damage.

For the first confirmed repair path, compare the original with the GE washer gasket WE9M58. Use the linked entry only when its full part number matches the installed identifier. Inspect the mating surface and any connector, bracket, seal, clip, or fastener that could cause the replacement to fail again.

Match the correct part by number and geometry

Copy every character from the original label, molded mark, or parts documentation. Then compare profile, diameter, lip direction, material, clamp groove, drain ports, hose nipples, spring tension, and the exact surfaces the seal contacts. A close visual match may still change load, timing, sealing, flow, or electrical behavior. Do not enlarge holes, move connector pins, trim seals, or bend a calibrated part to make another identifier fit.

The GE washer gasket clamp WH01X28350 illustrates why the number controls the choice. Confirm what is included with the listing and what must transfer from the old assembly. Reuse only undamaged transfer pieces that the service procedure identifies, and keep position-specific components in their original side or corner.

Check related systems before ordering

A fault can travel through more than one assembly. Check supply, supports, clearances, seals, sensors, controls, and the driven or mating component before authorizing the replacement. When the symptom involves the neighboring system, use the GE washer panels to keep the diagnosis tied to the actual failed function.

For ge washer gaskets and seals, also compare the GE washer drawers when wear or misalignment can originate there. Testing adjacent parts is not an excuse to replace several assemblies together. It prevents a verified new part from being overloaded, misaligned, overheated, or exposed to the same leak.

Installation planning and final checks

Plan the sequence before removing the old component. Photograph routing, installed side, fastener order, seals, and reference marks. During reassembly, clean grooves without scratching them, align drain holes and marks, seat the lip evenly, fit the correct clamp, and run an empty leak check before laundry. Keep tools and replacement parts away from unprotected electrical, refrigerant, water, glass, and moving surfaces.

After reassembling the ge washer gaskets and seals, complete a controlled, attended test that reproduces the original complaint without overloading the appliance. Check for leaks, abnormal sound, heat, odor, rubbing, repeated resets, and correct stopping behavior. Shut the machine down immediately if the repaired area moves out of position or a protective device operates.

Common problems and direct repair checks

Why does the GE washer door gasket leak only during tumble?

Inspect the lower folds for small cuts, trapped fabric, clamp movement, and drain-port blockage. Tub movement can open a defect that stays closed while the washer is idle. Match the confirmed failure to the GE washer door gasket WH05X29222 only after the original part number and surrounding fit have been checked.

Why does a new GE washer gasket leak at the clamp?

The seal lip may be twisted, outside the groove, contaminated with residue, or paired with the wrong band. Remove and reseat it evenly rather than overtightening. Match the confirmed failure to the GE washer door gasket WH05X29521 only after the original part number and surrounding fit have been checked.

Why does the GE washer gasket smell after cleaning?

Check hidden folds, drain holes, detergent quantity, standing water, and ventilation after use. Replace a gasket that remains deeply contaminated or has deteriorated material. Match the confirmed failure to the GE washer tub gasket WH08X10036 only after the original part number and surrounding fit have been checked.

Why is water appearing below the GE washer tub?

Trace the highest wet point. Door boots, tub seams, shaft seals, pumps, hoses, valves, and dispenser paths can all send water downward to the same area. Match the confirmed failure to the GE washer water-valve gasket assembly WH13X26534 only after the original part number and surrounding fit have been checked.

Symptom and inspection guide

Observed problem Direct check Part area
Why does the GE washer door gasket leak only during tumble Inspect the lower folds for small cuts, trapped fabric, clamp movement, and drain-port blockage door boots and bellows
Why does a new GE washer gasket leak at the clamp The seal lip may be twisted, outside the groove, contaminated with residue, or paired with the wrong band tub and shaft seals
Why does the GE washer gasket smell after cleaning Check hidden folds, drain holes, detergent quantity, standing water, and ventilation after use water-valve gaskets
Why is water appearing below the GE washer tub Trace the highest wet point hose and dispenser seals

Part-number and fit checklist

Check What to verify
Identifier Complete part number and every suffix.
Function Keep wash water inside the tub, door opening, valve joints, dispenser path, shaft area, and connected hoses while allowing designed movement.
Geometry and rating Profile, diameter, lip direction, material, clamp groove, drain ports, hose nipples, spring tension, and the exact surfaces the seal contacts.
Surroundings Tears in folds, hardened lips, mineral tracks, rust near clamps, mold that returns after cleaning, stretched retaining bands, cuts from trapped items, and leaks at shaft or valve joints.
Post-repair Clean grooves without scratching them, align drain holes and marks, seat the lip evenly, fit the correct clamp, and run an empty leak check before laundry.

Installation workflow

  1. Disconnect all relevant power and water or refrigerant sources before accessing ge washer gaskets and seals.
  2. Photograph the installed door boots and bellows, its routing, orientation, fasteners, and reference marks.
  3. Inspect the mating component around the tub and shaft seals and correct the cause of the original damage.
  4. Match the complete ge washer gaskets and seals part number, geometry, ratings, position, and included pieces.
  5. Install the water-valve gaskets without forcing, restore guards and clearances, and secure every connector or clamp.
  6. Run an attended ge washer gaskets and seals test and stop for leakage, rubbing, odor, heat, or a protective trip.

Installation and safety

A small leak can reach bearings, motors, wiring, flooring, or cabinet seams and may grow rapidly during spin. Disconnect and verify the energy source before access. Do not bypass an interlock, thermal limit, pressure device, or ground. Work involving live diagnosis, sealed refrigerant systems, heavy suspended assemblies, or complex structural disassembly belongs to a qualified technician.

Before ordering

  • Identify the exact failed door boots and bellows function and installed position.
  • Match the complete ge washer gaskets and seals part number before comparing appearance.
  • Inspect supports, seals, wiring, controls, and clearances adjacent to the tub and shaft seals.
  • Confirm what the water-valve gaskets listing includes and which pieces must transfer.
  • Plan a safe ge washer gaskets and seals test that reproduces the original symptom.

Run summary

Subcollection Primary keyword (vol.) Used verbatim? Secondary keywords Products Cross-links Excluded / validation Word count
GE Ice Maker Control Boards, Compressors, Fans, Blowers, and Switches Not supplied (N/A) N, none supplied None supplied 5 3 URL validation skipped by instruction 1303
GE Washer Brackets, Hardware, and Fasteners ge washer bracket (0) Y None supplied 6 3 URL validation skipped by instruction 1295
GE Washer Panels ge washer panel (140) Y None supplied 6 3 URL validation skipped by instruction 1305
GE Washer Caps and Covers ge washer cover (0) Y None supplied 6 3 URL validation skipped by instruction 1288
GE Washer Gaskets and Seals ge washer gasket seal (0) Y None supplied 6 3 URL validation skipped by instruction 1289

Search result

Show filters
1 - 40 out of 12 results found in 0.003s
Sorted by

A ge washer gaskets and seals fault should be diagnosed from the exact function that stopped, the conditions that trigger it, and the surrounding parts that may be loading or misaligning the component. This collection includes door boots and bellows, tub and shaft seals, water-valve gaskets, hose and dispenser seals, and retaining clamps and sealing rings. Similar-looking pieces can operate at different ratings or sit in different positions, so appearance is only a secondary check after the complete part number is known.

Begin with the machine disconnected from power and document the symptom before moving anything. Inspect tears in folds, hardened lips, mineral tracks, rust near clamps, mold that returns after cleaning, stretched retaining bands, cuts from trapped items, and leaks at shaft or valve joints. Replacement becomes reasonable when the defect is repeatable, the failed surface or electrical measurement is confirmed, or the part can no longer hold its specified position. Avoid replacing the category part solely because the appliance displays a broad symptom.

Determine what failed before replacing the part

Separate a component failure from an installation, supply, control, or adjacent-part problem. In this category, the part must keep wash water inside the tub, door opening, valve joints, dispenser path, shaft area, and connected hoses while allowing designed movement. Record when the symptom begins, which direction or cycle is active, whether temperature or load changes it, and whether the fault disappears after cooling or repositioning. Those observations narrow the diagnosis without bypassing a safety device.

For ge washer gaskets and seals, inspect the complete mechanical and electrical path. A loose mount, obstructed air or water path, shifted seal, damaged harness, or incorrect command can make a sound component look defective. Review the GE washer drums and tubs when the evidence points beyond the selected category.

When replacement is actually needed

Replace the identified part when cracks, deformation, open windings, leakage, burned terminals, loss of calibrated response, excessive play, or another confirmed defect prevents its normal function. A small leak can reach bearings, motors, wiring, flooring, or cabinet seams and may grow rapidly during spin. Stop use when movement, water, heat, or electricity can extend the damage.

For the first confirmed repair path, compare the original with the GE washer gasket WE9M58. Use the linked entry only when its full part number matches the installed identifier. Inspect the mating surface and any connector, bracket, seal, clip, or fastener that could cause the replacement to fail again.

Match the correct part by number and geometry

Copy every character from the original label, molded mark, or parts documentation. Then compare profile, diameter, lip direction, material, clamp groove, drain ports, hose nipples, spring tension, and the exact surfaces the seal contacts. A close visual match may still change load, timing, sealing, flow, or electrical behavior. Do not enlarge holes, move connector pins, trim seals, or bend a calibrated part to make another identifier fit.

The GE washer gasket clamp WH01X28350 illustrates why the number controls the choice. Confirm what is included with the listing and what must transfer from the old assembly. Reuse only undamaged transfer pieces that the service procedure identifies, and keep position-specific components in their original side or corner.

Check related systems before ordering

A fault can travel through more than one assembly. Check supply, supports, clearances, seals, sensors, controls, and the driven or mating component before authorizing the replacement. When the symptom involves the neighboring system, use the GE washer panels to keep the diagnosis tied to the actual failed function.

For ge washer gaskets and seals, also compare the GE washer drawers when wear or misalignment can originate there. Testing adjacent parts is not an excuse to replace several assemblies together. It prevents a verified new part from being overloaded, misaligned, overheated, or exposed to the same leak.

Installation planning and final checks

Plan the sequence before removing the old component. Photograph routing, installed side, fastener order, seals, and reference marks. During reassembly, clean grooves without scratching them, align drain holes and marks, seat the lip evenly, fit the correct clamp, and run an empty leak check before laundry. Keep tools and replacement parts away from unprotected electrical, refrigerant, water, glass, and moving surfaces.

After reassembling the ge washer gaskets and seals, complete a controlled, attended test that reproduces the original complaint without overloading the appliance. Check for leaks, abnormal sound, heat, odor, rubbing, repeated resets, and correct stopping behavior. Shut the machine down immediately if the repaired area moves out of position or a protective device operates.

Common problems and direct repair checks

Why does the GE washer door gasket leak only during tumble?

Inspect the lower folds for small cuts, trapped fabric, clamp movement, and drain-port blockage. Tub movement can open a defect that stays closed while the washer is idle. Match the confirmed failure to the GE washer door gasket WH05X29222 only after the original part number and surrounding fit have been checked.

Why does a new GE washer gasket leak at the clamp?

The seal lip may be twisted, outside the groove, contaminated with residue, or paired with the wrong band. Remove and reseat it evenly rather than overtightening. Match the confirmed failure to the GE washer door gasket WH05X29521 only after the original part number and surrounding fit have been checked.

Why does the GE washer gasket smell after cleaning?

Check hidden folds, drain holes, detergent quantity, standing water, and ventilation after use. Replace a gasket that remains deeply contaminated or has deteriorated material. Match the confirmed failure to the GE washer tub gasket WH08X10036 only after the original part number and surrounding fit have been checked.

Why is water appearing below the GE washer tub?

Trace the highest wet point. Door boots, tub seams, shaft seals, pumps, hoses, valves, and dispenser paths can all send water downward to the same area. Match the confirmed failure to the GE washer water-valve gasket assembly WH13X26534 only after the original part number and surrounding fit have been checked.

Symptom and inspection guide

Observed problem Direct check Part area
Why does the GE washer door gasket leak only during tumble Inspect the lower folds for small cuts, trapped fabric, clamp movement, and drain-port blockage door boots and bellows
Why does a new GE washer gasket leak at the clamp The seal lip may be twisted, outside the groove, contaminated with residue, or paired with the wrong band tub and shaft seals
Why does the GE washer gasket smell after cleaning Check hidden folds, drain holes, detergent quantity, standing water, and ventilation after use water-valve gaskets
Why is water appearing below the GE washer tub Trace the highest wet point hose and dispenser seals

Part-number and fit checklist

Check What to verify
Identifier Complete part number and every suffix.
Function Keep wash water inside the tub, door opening, valve joints, dispenser path, shaft area, and connected hoses while allowing designed movement.
Geometry and rating Profile, diameter, lip direction, material, clamp groove, drain ports, hose nipples, spring tension, and the exact surfaces the seal contacts.
Surroundings Tears in folds, hardened lips, mineral tracks, rust near clamps, mold that returns after cleaning, stretched retaining bands, cuts from trapped items, and leaks at shaft or valve joints.
Post-repair Clean grooves without scratching them, align drain holes and marks, seat the lip evenly, fit the correct clamp, and run an empty leak check before laundry.

Installation workflow

  1. Disconnect all relevant power and water or refrigerant sources before accessing ge washer gaskets and seals.
  2. Photograph the installed door boots and bellows, its routing, orientation, fasteners, and reference marks.
  3. Inspect the mating component around the tub and shaft seals and correct the cause of the original damage.
  4. Match the complete ge washer gaskets and seals part number, geometry, ratings, position, and included pieces.
  5. Install the water-valve gaskets without forcing, restore guards and clearances, and secure every connector or clamp.
  6. Run an attended ge washer gaskets and seals test and stop for leakage, rubbing, odor, heat, or a protective trip.

Installation and safety

A small leak can reach bearings, motors, wiring, flooring, or cabinet seams and may grow rapidly during spin. Disconnect and verify the energy source before access. Do not bypass an interlock, thermal limit, pressure device, or ground. Work involving live diagnosis, sealed refrigerant systems, heavy suspended assemblies, or complex structural disassembly belongs to a qualified technician.

Before ordering

  • Identify the exact failed door boots and bellows function and installed position.
  • Match the complete ge washer gaskets and seals part number before comparing appearance.
  • Inspect supports, seals, wiring, controls, and clearances adjacent to the tub and shaft seals.
  • Confirm what the water-valve gaskets listing includes and which pieces must transfer.
  • Plan a safe ge washer gaskets and seals test that reproduces the original symptom.

Run summary

Subcollection Primary keyword (vol.) Used verbatim? Secondary keywords Products Cross-links Excluded / validation Word count
GE Ice Maker Control Boards, Compressors, Fans, Blowers, and Switches Not supplied (N/A) N, none supplied None supplied 5 3 URL validation skipped by instruction 1303
GE Washer Brackets, Hardware, and Fasteners ge washer bracket (0) Y None supplied 6 3 URL validation skipped by instruction 1295
GE Washer Panels ge washer panel (140) Y None supplied 6 3 URL validation skipped by instruction 1305
GE Washer Caps and Covers ge washer cover (0) Y None supplied 6 3 URL validation skipped by instruction 1288
GE Washer Gaskets and Seals ge washer gasket seal (0) Y None supplied 6 3 URL validation skipped by instruction 1289

33 products

Part

GE Washer Water Inlet Valve Assembly - WH13X26535
WH13X26535
$43.95 $57.14

In stock 129 Products

Quick View

In stock 129 Products

Part

GE

$43.95 $57.14
Quick View

Part

GE WH13X26534 Washer Water Valve Gasket Assembly
WH13X26534
$44.95 $51.95

In stock 95 Products

Quick View

In stock 95 Products

Part

GE

$44.95 $51.95
Quick View

Part

GE Boot Gasket Clamp WH05X29663
WH05X29663
$7.95 $14.95

In stock 42 Products

Quick View

In stock 42 Products

Part

GE

$7.95 $14.95
Quick View

Part

GE Door Boot Gasket Seal WH08X23479
WH08X23479
$140.95 $183.24

In stock 0 Products

Quick View

In stock 0 Products

Part

GE

$140.95 $183.24
Quick View

Part

GE Washer Door Boot Gasket - WH05X29521
WH05X29521
$97.72 $127.04

In stock 35 Products

Quick View

In stock 35 Products

Part

GE

$97.72 $127.04
Quick View

Part

GE Door Boot Gasket WH05X29521
WH05X29521
$97.72 $127.04

In stock 35 Products

Quick View

In stock 35 Products

Part

GE

$97.72 $127.04
Quick View

Part

GE Part# WH01X29615 Inner Gasket Clamp - Genuine OEM
WH01X29615
$9.95 $12.94

In stock 22 Products

Quick View

In stock 22 Products

Part

GE

$9.95 $12.94
Quick View

Part

GE Part# WE9M58 Door Gasket (OEM)
WE9M58
$50.11 $57.11

In stock 9 Products

Quick View

In stock 9 Products

Part

GE

$50.11 $57.11
Quick View

Part

GE Washers and Dryer Door Boot Seal/Bellow WH08X10036
WH08X10036
$120.30 $156.39

In stock 0 Products

Quick View

In stock 0 Products

NLA

GE

$120.30 $156.39
Quick View

Part

Ge Gasket Door Lower - WE9M59
WE9M59
$42.04 $54.66

In stock 9 Products

Quick View

In stock 9 Products

Part

GE

$42.04 $54.66
Quick View

Part

GE Outer Gasket Clamp WH01X28350
WH01X28350
$16.11 $23.11

In stock 27 Products

Quick View

In stock 27 Products

Part

GE

$16.11 $23.11
Quick View

Part

Ge Back Tighteningring Of Cushion - WH08X26291
WH08X26291
$13.95 $18.14

In stock 10 Products

Quick View

In stock 10 Products

Part

GE

$13.95 $18.14
Quick View

Part

Ge Gasket - Door - WH01X27849
WH01X27849
$73.95

In stock 0 Products

Quick View

In stock 0 Products

NLA

GE

$73.95
Quick View

Part

GE Door Boot Gasket - Black WH10X27131
WH10X27131
$78.95 $102.64

In stock 3 Products

Quick View

In stock 3 Products

Part

GE

$78.95 $102.64
Quick View

Part

WH02X10033
$53.85 $70.01

In stock 0 Products

Quick View

In stock 0 Products

Part

GE

$53.85 $70.01
Quick View

Part

WH08X27270
$11.85 $229.92

In stock 0 Products

Quick View

In stock 0 Products

Part

GE

$11.85 $229.92
Quick View

Part

WB02X39041
$45.95 $229.92

In stock 0 Products

Quick View

In stock 0 Products

Part

GE

$45.95 $229.92
Quick View

Part

WB02X39040
$42.95 $57.14

In stock 0 Products

Quick View

In stock 0 Products

Part

GE

$42.95 $57.14
Quick View

Part

WB02X10593
$247.85 $322.21

In stock 0 Products

Quick View

In stock 0 Products

Part

GE

$247.85 $322.21
Quick View

Part

Ge Gasket Clamp Front Panel - WH02X10353
WH02X10353
$32.89 $57.14

In stock 0 Products

Quick View

In stock 0 Products

Part

GE

$32.89 $57.14
Quick View

Frequently Asked Questions

Quick answers for your replacement part needs

Where can I find genuine replacement parts for my appliance?

Finding genuine replacement parts for your appliances has never been easier! We offer authentic parts for over 250 brands, including LG, Samsung, Whirlpool, Kenmore, Bosch, and Liebherr. Simply enter your appliance's model number on our website, and explore our extensive selection of compatible parts designed to restore your appliance's peak performance and reliability.

What type of appliance parts and accessories are available for purchase?

Are your replacement parts compatible with all models?

What if I can’t find the appliance part I need?

How can I track my order for appliance parts online?

How long will it take to receive my replacement parts order?

Can I return appliance parts if they are not compatible with my model?

How can I update my shipping address after placing an order?

How can I get in touch with customer support?

Couldn’t find the answer to your question?

Your satisfaction matters. Let us know how we can assist with your repair journey.

Your Cart ( 0 items)

You currently have 0 items in your Cart

Return to shop
Menu

Compatible Models