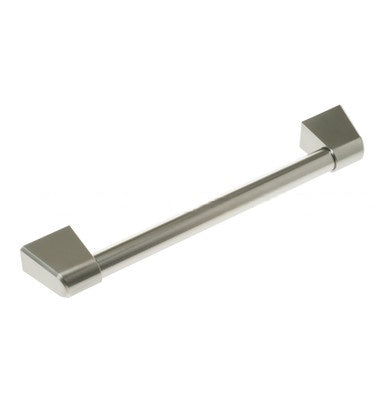
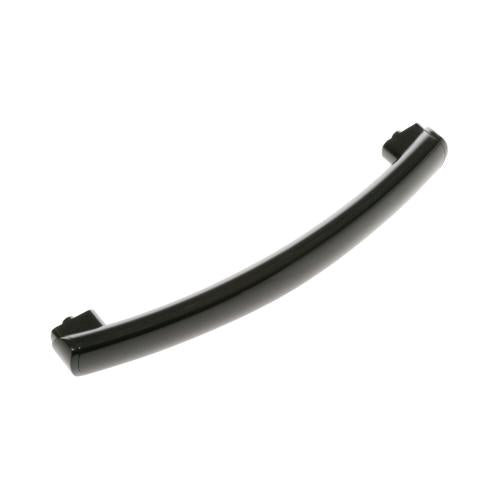
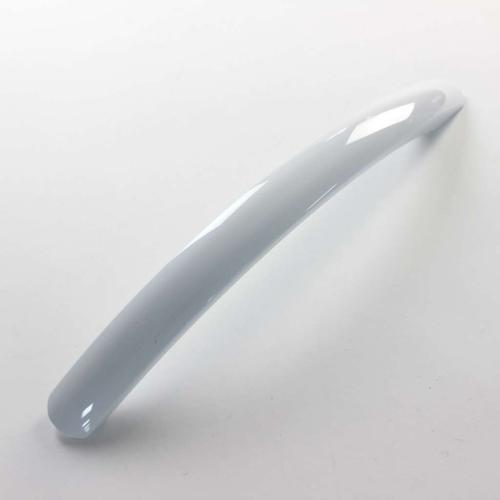
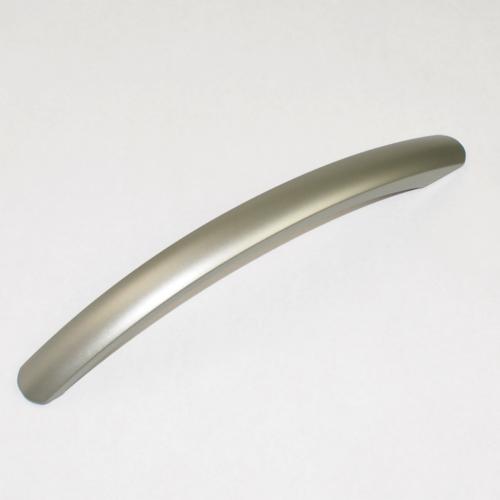
A GE microwave handle replacement must match the door structure, not just the appliance finish. Handles can differ in overall length, center-to-center mounting distance, standoff depth, screw direction, hidden end caps, supports, and the way they meet the inner and outer door panels. Two stainless-look handles may appear identical from the front while using different posts or fasteners behind the trim.
Determine why the handle failed before removing the door trim. A loose handle may need tightened hardware, but a cracked handle base, stripped insert, broken door boss, or distorted outer panel requires the affected component. If the door has been pulled out of alignment, inspect hinge support, latch engagement, glass, choke area, and the gap around the cavity. Stop use when the door is bent, will not close squarely, or has damaged safety surfaces.
Handle access varies. Some screws are reachable after opening the door, while others require removal of an inner trim or door panel. Do not pry near glass, mesh, shielding film, or the choke area without the assigned procedure. Internal door disassembly can affect shielding and alignment, so trained service is appropriate when the handle cannot be accessed through designated fasteners. Support the door and protect its finish throughout the repair.
Quick inspection sequence
- With power disconnected, check movement at the upper post, lower post, handle body, door panel, and hinge side while supporting the door.
- Inspect for cracks, pulled inserts, stripped screws, loose hidden nuts, broken end caps, heat distortion, sharp edges, and finish separation.
- Check the door gap, hinge support, latch heads, glass, trim, and panel around each mounting point. Handle force may have damaged more than the handle.
- Determine the approved access path. Do not pry off inner trim or films solely because no exterior screw is visible.
- Measure overall length, mounting-center spacing, standoff depth, post profile, screw direction, and clearance from the control panel and grille.
- Photograph screw length, washers, spacers, brackets, trim tabs, handle orientation, and every door layer the procedure permits transferring.
Match the correct GE microwave handle part part
- Match the complete part number, finish, color, texture, contour, and whether the item is a full handle, post, support, cap, or handle assembly.
- Compare overall length, center-to-center spacing, standoff, post width, end angle, curvature, door profile, and adjacent-panel clearance.
- Match screw diameter, pitch, length, access direction, insert depth, washers, spacers, and any mounting support inside the door.
- Confirm included hardware and trim. Do not reuse a cracked insert, stripped screw, bent support, or broken panel boss behind the new handle.
- Verify handed orientation and appearance before tightening. A reversed or incorrect handle can contact the panel and stress the glass or trim.
Common problems and repair checks
Why is the GE microwave door handle loose at one end?
Disconnect power and support the door while checking whether movement comes from the screw, handle post, threaded insert, inner support, or door panel. Tighten only after confirming the correct access and screw length. A screw that turns without clamping can indicate a stripped insert or cracked boss. Compare the GE microwave handle WB15X10022 by part number, mounting spacing, post design, finish, and screw direction. Do not use a longer screw to reach damaged threads because it may contact another door layer. Replace the failed receiving part and tighten evenly so the handle sits flush without pulling the outer panel inward.
Why did the GE microwave handle crack again after replacement?
A repeat crack can result from over-tightened screws, a warped door panel, binding hinges, excessive opening force, wrong standoff depth, or a support omitted during the first repair. Check whether the door must be lifted, pushed sideways, or pulled hard to release. Correct hinge and latch resistance before fitting the GE microwave handle part WB15X10154. Match the complete part number, post geometry, support stack, and fasteners. Tighten until secure without crushing molded posts. A handle should carry normal opening force through both mounts; it should not be used to compensate for a door that binds against the control panel or cavity.
Why will the replacement GE microwave handle screws not line up?
Do not enlarge the door holes or pull the posts into alignment with the screws. Compare center spacing, handed orientation, upper and lower post shape, transferred brackets, spacers, and the order of door trim layers. A similar handle may have a different offset even when its overall length matches. Compare the GE microwave handle part WB15X10218 by exact part number, mounting centers, screw direction, and door contour. Also inspect whether the outer panel has shifted or a mounting support is reversed. Start both screws by hand before tightening either one, and stop if the panel bends or the glass stack moves.
Why does the GE microwave handle feel hot during cooktop use?
Some warmth can transfer to an over-the-range handle, but unusual heat can indicate blocked ventilation, misdirected exhaust, prolonged surface heat, a missing shield, or an incorrect handle material or spacing. Stop using the appliance if the handle becomes unsafe to touch, softens, discolors, or is accompanied by an electrical odor. Inspect filters, grille, vent path, and heat shields before replacing the handle. Compare the GE microwave handle part WB15X10239 by part number, material, finish, standoff, and assigned door. A new handle will not correct hot air discharged against the door by a vent installed in the wrong configuration.
Why does the GE microwave handle rub the control panel or grille?
Disconnect power and examine door sag, hinge looseness, handle orientation, standoff depth, panel position, and grille seating. Rubbing that appears after service often indicates a missed door spacer, wrong handle, shifted panel, or hinge installed out of position. Match the GE microwave handle part WB15X10264 by complete part number, contour, mount spacing, post depth, and finish. Do not grind the handle or bend the control panel to create clearance. Restore the door geometry first, then verify a consistent gap throughout the full swing and natural latch engagement without lifting the door.
Symptom and decision guide
|
Observed symptom
|
Check before ordering
|
Repair direction
|
|
One post moves
|
Screw, insert, support, boss, panel
|
Repair the actual receiving point
|
|
Handle cracks repeatedly
|
Door binding, screw torque, support stack, fit
|
Correct stress before replacement
|
|
Screws will not align
|
Mount centers, handedness, spacers, panel position
|
Do not drill or force posts together
|
|
Handle rubs panel
|
Door sag, standoff, panel and grille alignment
|
Restore door geometry and clearance
|
Related GE part categories
If the handle mounts are intact but the supporting door panel is cracked or distorted, inspect the GE microwave door, drawer, gasket, and seal collection. Door safety geometry takes priority over cosmetic repair.
When the door sags and pulls the handle into the panel, compare the GE microwave hinge collection. Correct hinge support before tightening the handle.
If excessive release force caused the handle failure, review the GE microwave latch, lock, and spring collection. The latch path should move without slamming or twisting the door.
Installation and safety
- Disconnect power, support the door, and stop use if the door, glass, latch points, choke area, or cavity face is damaged.
- Photograph fasteners, spacers, supports, trim, films, and door layers. Follow the designated access path without prying shielding or glass.
- Install the exact handle and receiving hardware. Start both mounts by hand and tighten evenly without crushing posts or distorting the panel.
- Verify a secure grip, smooth door swing, even gap, natural latch engagement, and clearance from the control panel and grille.
Before-ordering checklist
|
Verify
|
What must match
|
|
Handle identity
|
Complete part number, full handle or support, finish, color, texture, contour, and handed orientation
|
|
Dimensions
|
Overall length, mounting centers, standoff, post width, end angle, curvature, and door clearance
|
|
Attachment
|
Screws, thread, length, inserts, bosses, brackets, washers, spacers, trim, and access direction
|
|
Door condition
|
Hinges, gap, latch, glass, choke area, panel structure, smooth release, and no rubbing
|