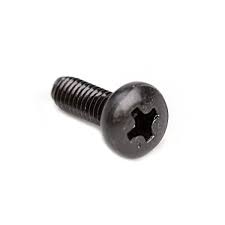
Cooktop Screw

Cooktop Screw Parts

Cooktop screw and stove bolt parts secure burners, frames, glass tops, control panels, brackets, trim, and mounting hardware. GenuineReplacementParts helps you find the correct cooktop screw, stove screw, stove bolt, range screw, burner screw, frame screw, and model-specific fastener for safe cooktop repair.

Small hardware can create big repair problems when the wrong size is used. A screw that is too long can damage wiring or glass supports, while a screw that is too short can leave a burner, frame, or control panel loose. If the missing hardware is part of a surface repair, inspect the related cooktop frame parts before placing the order.

Common Cooktop Hardware Types

Hardware type

Common location

Why exact fit matters

cooktop screw

General top, trim, or support areas

Length and thread prevent loose panels or surface stress

stove bolt

Mounting bracket or heavier support

Keeps appliance secured in the cutout

burner screw

Burner base or ignition bracket

Must handle heat and keep burner aligned

range screw

Range top, frame, or panel areas

May differ by appliance section

frame screw

Cooktop frame and trim

Wrong screw can bend trim or crack support points

Why Cooktop Screws Are Not Always Universal

Some appliance screws are common sizes, but many cooktop screws are model-specific because they secure parts exposed to heat, vibration, grease, and cleaning moisture. The thread size, length, head type, material, and coating can vary by location. A burner screw may be stainless steel and heat resistant. A frame screw may have a different head shape so it sits flush under trim. A mounting screw may be designed for a bracket under the countertop.

The best way to confirm the part is to use the appliance model number and the parts diagram. If the old fastener is available, compare the length, thread, head type, and whether it was used near flame, glass, or electrical parts.

Do not substitute random hardware when a screw holds a burner, gas part, or glass support. Hardware that looks close can still be wrong if it uses the wrong metal, strips the bracket, or applies pressure in the wrong area. A cracked glass panel, loose burner, or unstable control panel can start with something as small as the wrong screw.

Where Cooktop Screws and Bolts Are Used

Cooktop screws appear in many places: burner bases, ignition brackets, glass top supports, trim rings, control panels, switch mounts, frame brackets, underside clamps, and countertop mounting kits. Each location has a different job. Burner screws hold parts near high heat. Control panel screws keep switches aligned with knobs. Frame screws keep the top stable. Mounting bolts secure the whole cooktop in the cutout.

If a screw is missing from a burner base, the burner may not sit flat and the cap may not align correctly. That can cause uneven flame, delayed ignition, or cookware instability. In this situation, check the cooktop burner parts along with the screw because heat damage may affect both the fastener and the burner support.

If a screw is missing near glass or trim, the surface may lift, rattle, or allow spills into the appliance. A replacement screw should match the original size and shoulder style so it does not create stress on the glass or frame. If the glass has already cracked, the repair may also require a part from the cooktop glass collection.

Common Problems, Parts, and Solutions

Stripped burner screw: Heat, spills, and repeated cleaning can corrode burner screws. If the screw head is stripped, use the correct extraction method and avoid damaging the burner base. Replace the screw with the exact model-specific burner screw and inspect the surrounding base for cracks or corrosion.

Missing frame screw: A missing frame screw can make the cooktop feel loose in the countertop or cause a trim piece to lift. Replace the screw with the correct length and thread. If the hole is stripped, check whether the frame bracket or clip also needs replacement.

Wrong stove bolt installed by a previous repair: Oversized hardware can crack plastic, bend trim, or damage a mounting bracket. If the panel does not sit flush after a repair, remove the hardware and compare it to the parts diagram. Replace incorrect stove bolts with the proper OEM-style fastener.

Control panel screw missing: Switches and knobs can feel loose when the panel hardware is missing. Before replacing the switch, check whether the control panel screws are secure. If the knobs scrape or wobble, inspect the panel, screws, and cooktop knob parts together.

Rust around screw holes: Rust can spread from a screw to the bracket or top panel. Replace rusted screws and clean the seating area. If the screw hole is enlarged or the bracket is weak, replace the supporting frame or bracket instead of using a larger screw.

Screw Replacement Checklist

Check

Reason

Model number

Confirms exact hardware list

Part location

Separates burner screws from frame and panel screws

Length and thread

Prevents cross-threading or bottoming out

Head type

Ensures correct tool and flush fit

Material

Important near heat, moisture, and gas burner areas

How to Match the Correct Cooktop Screw

Use the model number first. Then identify where the screw is used: burner, frame, trim, control panel, glass support, or mounting bracket. If the parts diagram lists several screws, do not assume they are interchangeable. A short trim screw and a longer mounting screw can look similar in a product photo but behave very differently in the appliance.

If you still have the old screw, measure the total length, note the thread type, and identify the head style. Common head styles include Phillips, Torx, hex, and specialty appliance heads. Also check whether the screw is stainless, plated, black, or heat-discolored. Hardware near burners often needs heat and corrosion resistance.

If the old screw broke during removal, inspect the hole and bracket. A broken screw can leave metal inside the threaded area. Forcing a new screw into blocked threads can strip the bracket. Clean the area carefully and replace related clips, brackets, or rings if they were damaged.

Safety and Installation Notes

Disconnect power before removing screws from control panels, glass tops, or switch areas. Turn off gas before removing screws that secure gas burner bases or internal parts. A screw repair can expose wiring, gas tubing, igniters, or sharp metal edges, so treat even small hardware jobs with the same care as larger repairs.

Start screws by hand before tightening. This helps prevent cross-threading. Tighten evenly and stop when the part is secure. Over-tightening can crack glass supports, deform trim, strip brackets, or make burner parts sit unevenly. If a screw does not tighten, the receiving clip or bracket may be damaged.

After replacing screws or bolts, test the part they secure. A burner should sit flat. A frame should not rattle. A control panel should hold switches firmly. A mounted cooktop should not shift in the countertop. Small checks after installation can prevent the same fastener from failing again.

Why Buy Cooktop Screws from GenuineReplacementParts?

GenuineReplacementParts helps users avoid guesswork with model-specific cooktop hardware. The right screw or stove bolt can restore alignment, prevent rattling, hold high-heat parts safely, and protect expensive components like glass tops and control panels.

Search result

Show filters
1 - 40 out of 12 results found in 0.003s
Sorted by

Cooktop screw and stove bolt parts secure burners, frames, glass tops, control panels, brackets, trim, and mounting hardware. GenuineReplacementParts helps you find the correct cooktop screw, stove screw, stove bolt, range screw, burner screw, frame screw, and model-specific fastener for safe cooktop repair.

Small hardware can create big repair problems when the wrong size is used. A screw that is too long can damage wiring or glass supports, while a screw that is too short can leave a burner, frame, or control panel loose. If the missing hardware is part of a surface repair, inspect the related cooktop frame parts before placing the order.

Common Cooktop Hardware Types

Hardware type

Common location

Why exact fit matters

cooktop screw

General top, trim, or support areas

Length and thread prevent loose panels or surface stress

stove bolt

Mounting bracket or heavier support

Keeps appliance secured in the cutout

burner screw

Burner base or ignition bracket

Must handle heat and keep burner aligned

range screw

Range top, frame, or panel areas

May differ by appliance section

frame screw

Cooktop frame and trim

Wrong screw can bend trim or crack support points

Why Cooktop Screws Are Not Always Universal

Some appliance screws are common sizes, but many cooktop screws are model-specific because they secure parts exposed to heat, vibration, grease, and cleaning moisture. The thread size, length, head type, material, and coating can vary by location. A burner screw may be stainless steel and heat resistant. A frame screw may have a different head shape so it sits flush under trim. A mounting screw may be designed for a bracket under the countertop.

The best way to confirm the part is to use the appliance model number and the parts diagram. If the old fastener is available, compare the length, thread, head type, and whether it was used near flame, glass, or electrical parts.

Do not substitute random hardware when a screw holds a burner, gas part, or glass support. Hardware that looks close can still be wrong if it uses the wrong metal, strips the bracket, or applies pressure in the wrong area. A cracked glass panel, loose burner, or unstable control panel can start with something as small as the wrong screw.

Where Cooktop Screws and Bolts Are Used

Cooktop screws appear in many places: burner bases, ignition brackets, glass top supports, trim rings, control panels, switch mounts, frame brackets, underside clamps, and countertop mounting kits. Each location has a different job. Burner screws hold parts near high heat. Control panel screws keep switches aligned with knobs. Frame screws keep the top stable. Mounting bolts secure the whole cooktop in the cutout.

If a screw is missing from a burner base, the burner may not sit flat and the cap may not align correctly. That can cause uneven flame, delayed ignition, or cookware instability. In this situation, check the cooktop burner parts along with the screw because heat damage may affect both the fastener and the burner support.

If a screw is missing near glass or trim, the surface may lift, rattle, or allow spills into the appliance. A replacement screw should match the original size and shoulder style so it does not create stress on the glass or frame. If the glass has already cracked, the repair may also require a part from the cooktop glass collection.

Common Problems, Parts, and Solutions

Stripped burner screw: Heat, spills, and repeated cleaning can corrode burner screws. If the screw head is stripped, use the correct extraction method and avoid damaging the burner base. Replace the screw with the exact model-specific burner screw and inspect the surrounding base for cracks or corrosion.

Missing frame screw: A missing frame screw can make the cooktop feel loose in the countertop or cause a trim piece to lift. Replace the screw with the correct length and thread. If the hole is stripped, check whether the frame bracket or clip also needs replacement.

Wrong stove bolt installed by a previous repair: Oversized hardware can crack plastic, bend trim, or damage a mounting bracket. If the panel does not sit flush after a repair, remove the hardware and compare it to the parts diagram. Replace incorrect stove bolts with the proper OEM-style fastener.

Control panel screw missing: Switches and knobs can feel loose when the panel hardware is missing. Before replacing the switch, check whether the control panel screws are secure. If the knobs scrape or wobble, inspect the panel, screws, and cooktop knob parts together.

Rust around screw holes: Rust can spread from a screw to the bracket or top panel. Replace rusted screws and clean the seating area. If the screw hole is enlarged or the bracket is weak, replace the supporting frame or bracket instead of using a larger screw.

Screw Replacement Checklist

Check

Reason

Model number

Confirms exact hardware list

Part location

Separates burner screws from frame and panel screws

Length and thread

Prevents cross-threading or bottoming out

Head type

Ensures correct tool and flush fit

Material

Important near heat, moisture, and gas burner areas

How to Match the Correct Cooktop Screw

Use the model number first. Then identify where the screw is used: burner, frame, trim, control panel, glass support, or mounting bracket. If the parts diagram lists several screws, do not assume they are interchangeable. A short trim screw and a longer mounting screw can look similar in a product photo but behave very differently in the appliance.

If you still have the old screw, measure the total length, note the thread type, and identify the head style. Common head styles include Phillips, Torx, hex, and specialty appliance heads. Also check whether the screw is stainless, plated, black, or heat-discolored. Hardware near burners often needs heat and corrosion resistance.

If the old screw broke during removal, inspect the hole and bracket. A broken screw can leave metal inside the threaded area. Forcing a new screw into blocked threads can strip the bracket. Clean the area carefully and replace related clips, brackets, or rings if they were damaged.

Safety and Installation Notes

Disconnect power before removing screws from control panels, glass tops, or switch areas. Turn off gas before removing screws that secure gas burner bases or internal parts. A screw repair can expose wiring, gas tubing, igniters, or sharp metal edges, so treat even small hardware jobs with the same care as larger repairs.

Start screws by hand before tightening. This helps prevent cross-threading. Tighten evenly and stop when the part is secure. Over-tightening can crack glass supports, deform trim, strip brackets, or make burner parts sit unevenly. If a screw does not tighten, the receiving clip or bracket may be damaged.

After replacing screws or bolts, test the part they secure. A burner should sit flat. A frame should not rattle. A control panel should hold switches firmly. A mounted cooktop should not shift in the countertop. Small checks after installation can prevent the same fastener from failing again.

Why Buy Cooktop Screws from GenuineReplacementParts?

GenuineReplacementParts helps users avoid guesswork with model-specific cooktop hardware. The right screw or stove bolt can restore alignment, prevent rattling, hold high-heat parts safely, and protect expensive components like glass tops and control panels.

80 products

Part

Samsung Part# 6002-000413 Tapping Screw - Genuine OEM
6002-000413
$5.45 $12.45

In stock 47 Products

Quick View

In stock 47 Products

Part

Samsung

$5.45 $12.45
Quick View

Part

Bosch Part# 00188978 Range Nut (OEM)
00188978
$13.23 $17.20

In stock 0 Products

Quick View

In stock 0 Products

NLA

Bosch

$13.23 $17.20
Quick View

Part

Bosch 00 Set Screw - 612117
00612117
$27.95

In stock 0 Products

Quick View

In stock 0 Products

Part

Bosch

$27.95
Quick View

Part

Whirlpool Part# WP90767 Hex Head Screw (OEM)
WP90767
$6.45 $13.45

In stock 20 Products

Quick View

In stock 20 Products

Part

Whirlpool

$6.45 $13.45
Quick View

Part

Samsung Part# 6001-002702 Machine Screw - Genuine OEM
6001-002702
$5.87 $12.87

In stock 39 Products

Quick View

In stock 39 Products

Part

Samsung

$5.87 $12.87
Quick View

Part

Ge Nut Chamfered - WB01X10321
WB01X10321
$5.95 $439.34

In stock 0 Products

Quick View

In stock 0 Products

NLA

GE

$5.95 $439.34
Quick View

Part

Bosch 00 Nut - 188978
188978
$11.95

In stock 0 Products

Quick View

In stock 0 Products

NLA

Bosch

$11.95
Quick View

Part

EBZ60716102
$11.95 $15.54

In stock 0 Products

Quick View

In stock 0 Products

Part

LG

$11.95 $15.54
Quick View

Part

EBZ60716002
$11.95 $15.54

In stock 0 Products

Quick View

In stock 0 Products

Part

LG

$11.95 $15.54
Quick View

Part

EBZ60714201
$16.95 $22.04

In stock 0 Products

Quick View

In stock 0 Products

NLA

LG

$16.95 $22.04
Quick View

Part

1TTL0502618
$11.95

In stock 0 Products

Quick View

In stock 0 Products

NLA

LG

$11.95
Quick View

Part

6009-002267
$0.00

In stock 0 Products

Quick View

In stock 0 Products

NLA

Samsung

$0.00
Quick View

Part

6001-000044
$5.85 $7.61

In stock 0 Products

Quick View

In stock 0 Products

Part

Samsung

$5.85 $7.61
Quick View

Part

83672
$0.95 $1.24

In stock 0 Products

Quick View

In stock 0 Products

NLA

Dacor

$0.95 $1.24
Quick View

Part

83326
$0.27 $0.35

In stock 0 Products

Quick View

In stock 0 Products

NLA

Dacor

$0.27 $0.35
Quick View

Part

115002
$0.00

In stock 0 Products

Quick View

In stock 0 Products

NLA

Dacor

$0.00
Quick View

Part

105587
$0.00

In stock 0 Products

Quick View

In stock 0 Products

NLA

Dacor

$0.00
Quick View

Part

105753
$0.00

In stock 0 Products

Quick View

In stock 0 Products

NLA

Dacor

$0.00
Quick View

Part

105455
$0.00

In stock 0 Products

Quick View

In stock 0 Products

NLA

Dacor

$0.00
Quick View

Part

105447
$0.00

In stock 0 Products

Quick View

In stock 0 Products

NLA

Dacor

$0.00
Quick View

Frequently Asked Questions

Quick answers for your replacement part needs

Where can I find genuine replacement parts for my appliance?

Finding genuine replacement parts for your appliances has never been easier! We offer authentic parts for over 250 brands, including LG, Samsung, Whirlpool, Kenmore, Dyson, Bosch, and Liebherr. Simply enter your appliance's model number on our website, and explore our extensive selection of compatible parts designed to restore your appliance's peak performance and reliability.

What type of appliance parts and accessories are available for purchase?

Are your replacement parts compatible with all models?

What if I can’t find the appliance part I need?

How can I track my order for appliance parts online?

How long will it take to receive my replacement parts order?

Can I return appliance parts if they are not compatible with my model?

How can I update my shipping address after placing an order?

How can I get in touch with customer support?

Couldn’t find the answer to your question?

Your satisfaction matters. Let us know how we can assist with your repair journey.

Your Cart ( 0 items)

You currently have 0 items in your Cart

Return to shop
Menu

Compatible Models